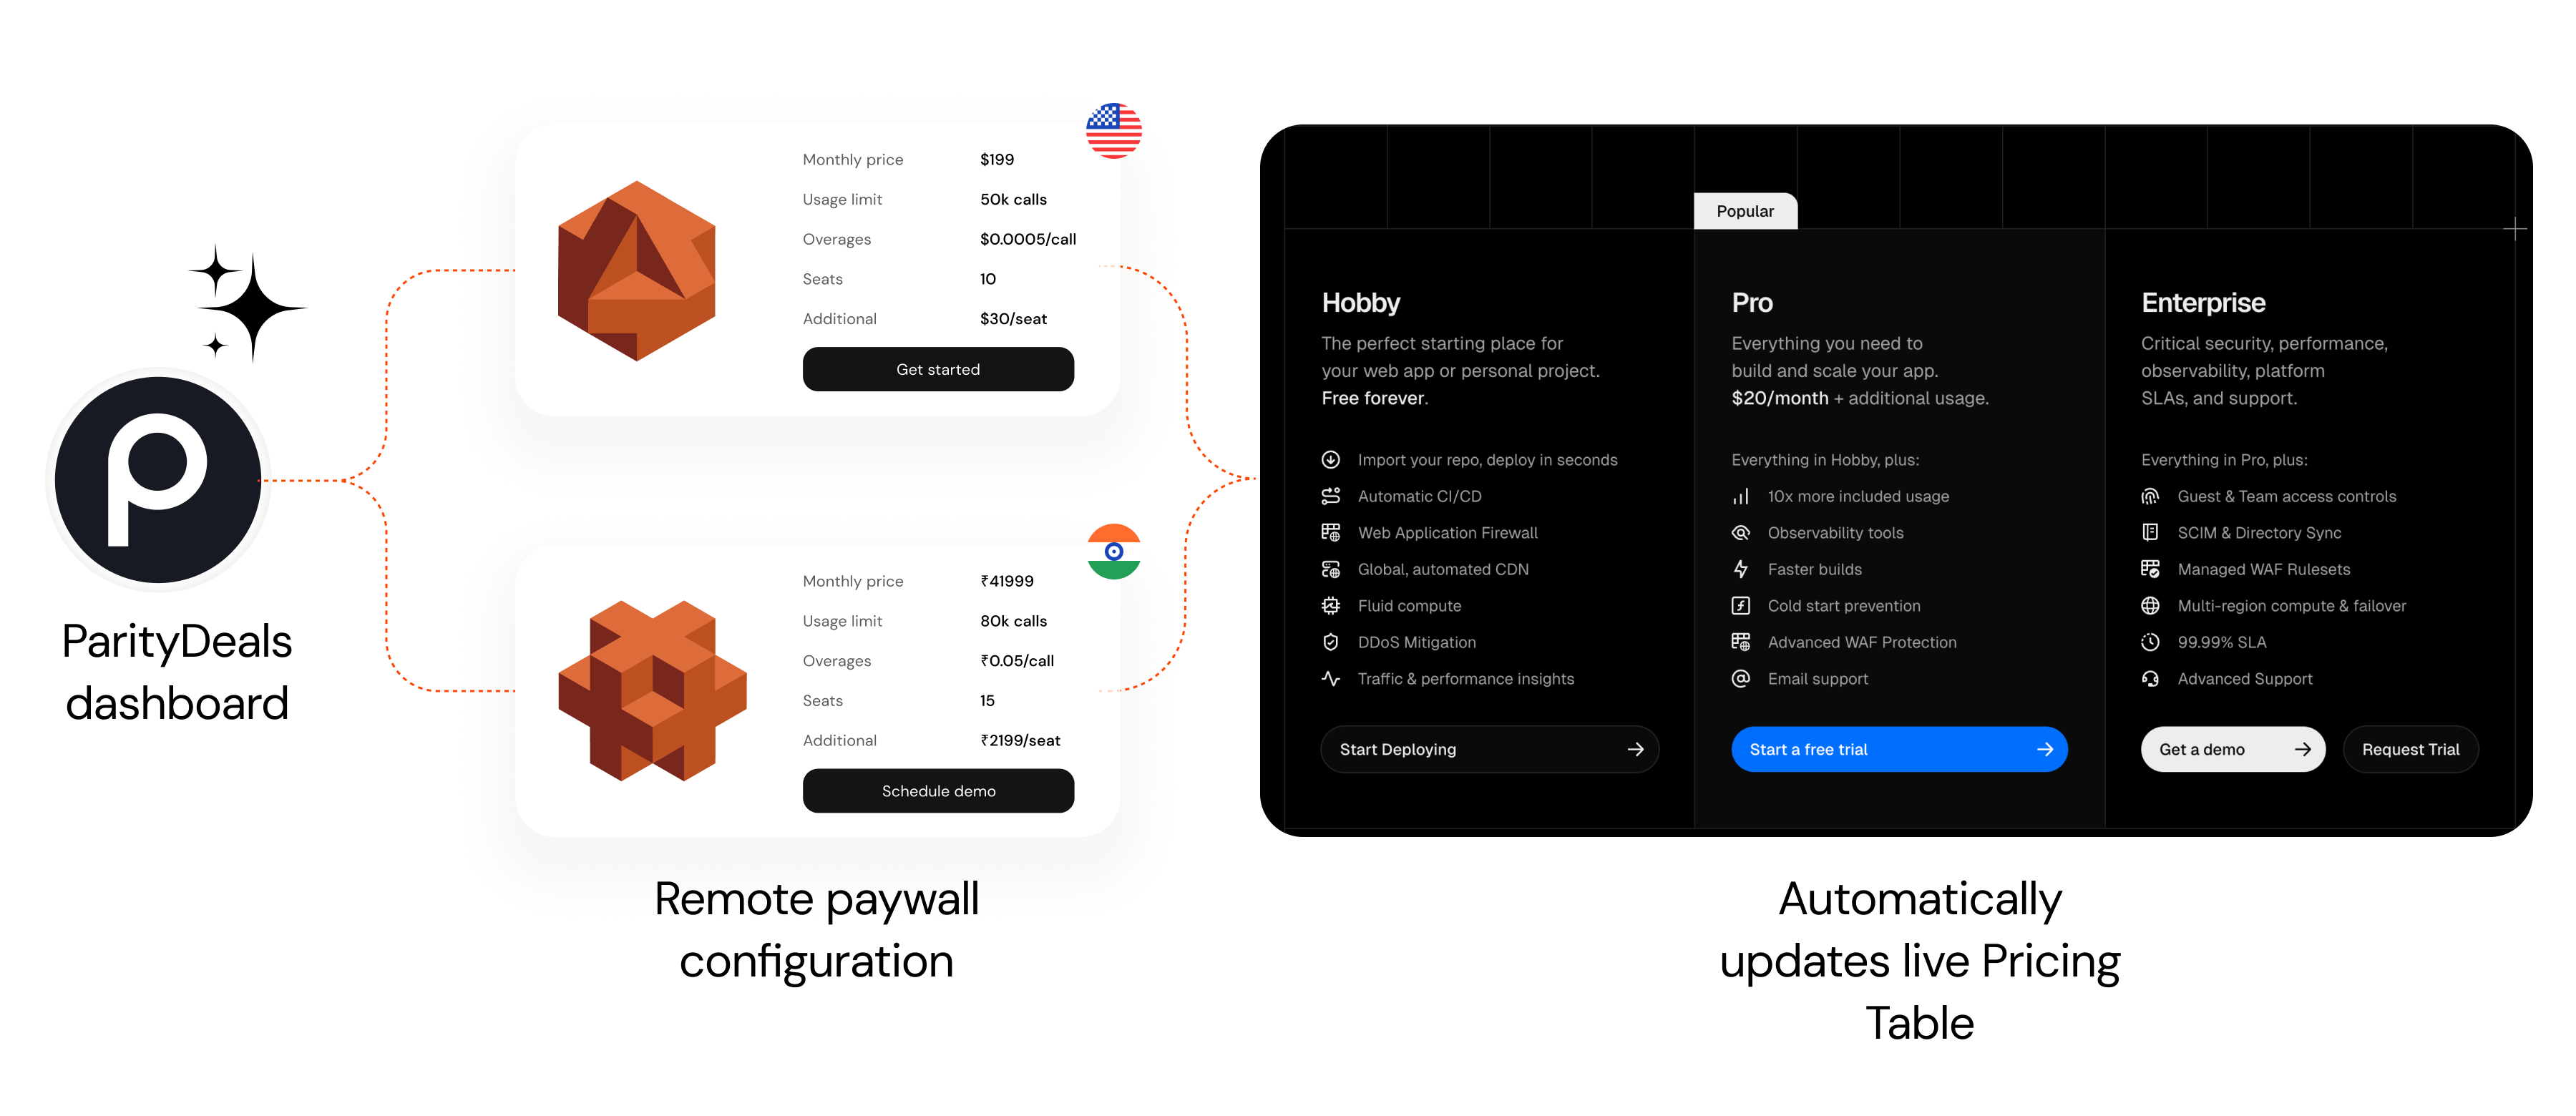
What are ParityDeals Pricing tables?
ParityDeals’ Pricing tables are dynamic, remotely configurable interfaces that present your pricing plans and features to your customers. They are the crucial touchpoint where users make subscription decisions. Our Pricing tables empower you to design, build, and deploy your entire pricing presentation—from simple pricing tables to complex, interactive subscription flows—directly from the ParityDeals dashboard, minimizing the need for code changes or app updates for most modifications. Key benefits include:- Remote Configuration: Update your pricing table’s appearance, content, and even the plans displayed, directly from the ParityDeals dashboard.
- No-Code for Most Changes: Iterate on your pricing display rapidly. Most visual and content changes are reflected instantly without engineering intervention.
- Dynamic Pricing Display: Any modifications to your underlying pricing models (plans, features, prices) are automatically reflected in your pricing tables, ensuring consistency.
- Experimentation Ready: Easily A/B test different pricing table designs, plan presentations, and promotional content to optimize conversion.
Getting Started with Pricing tables
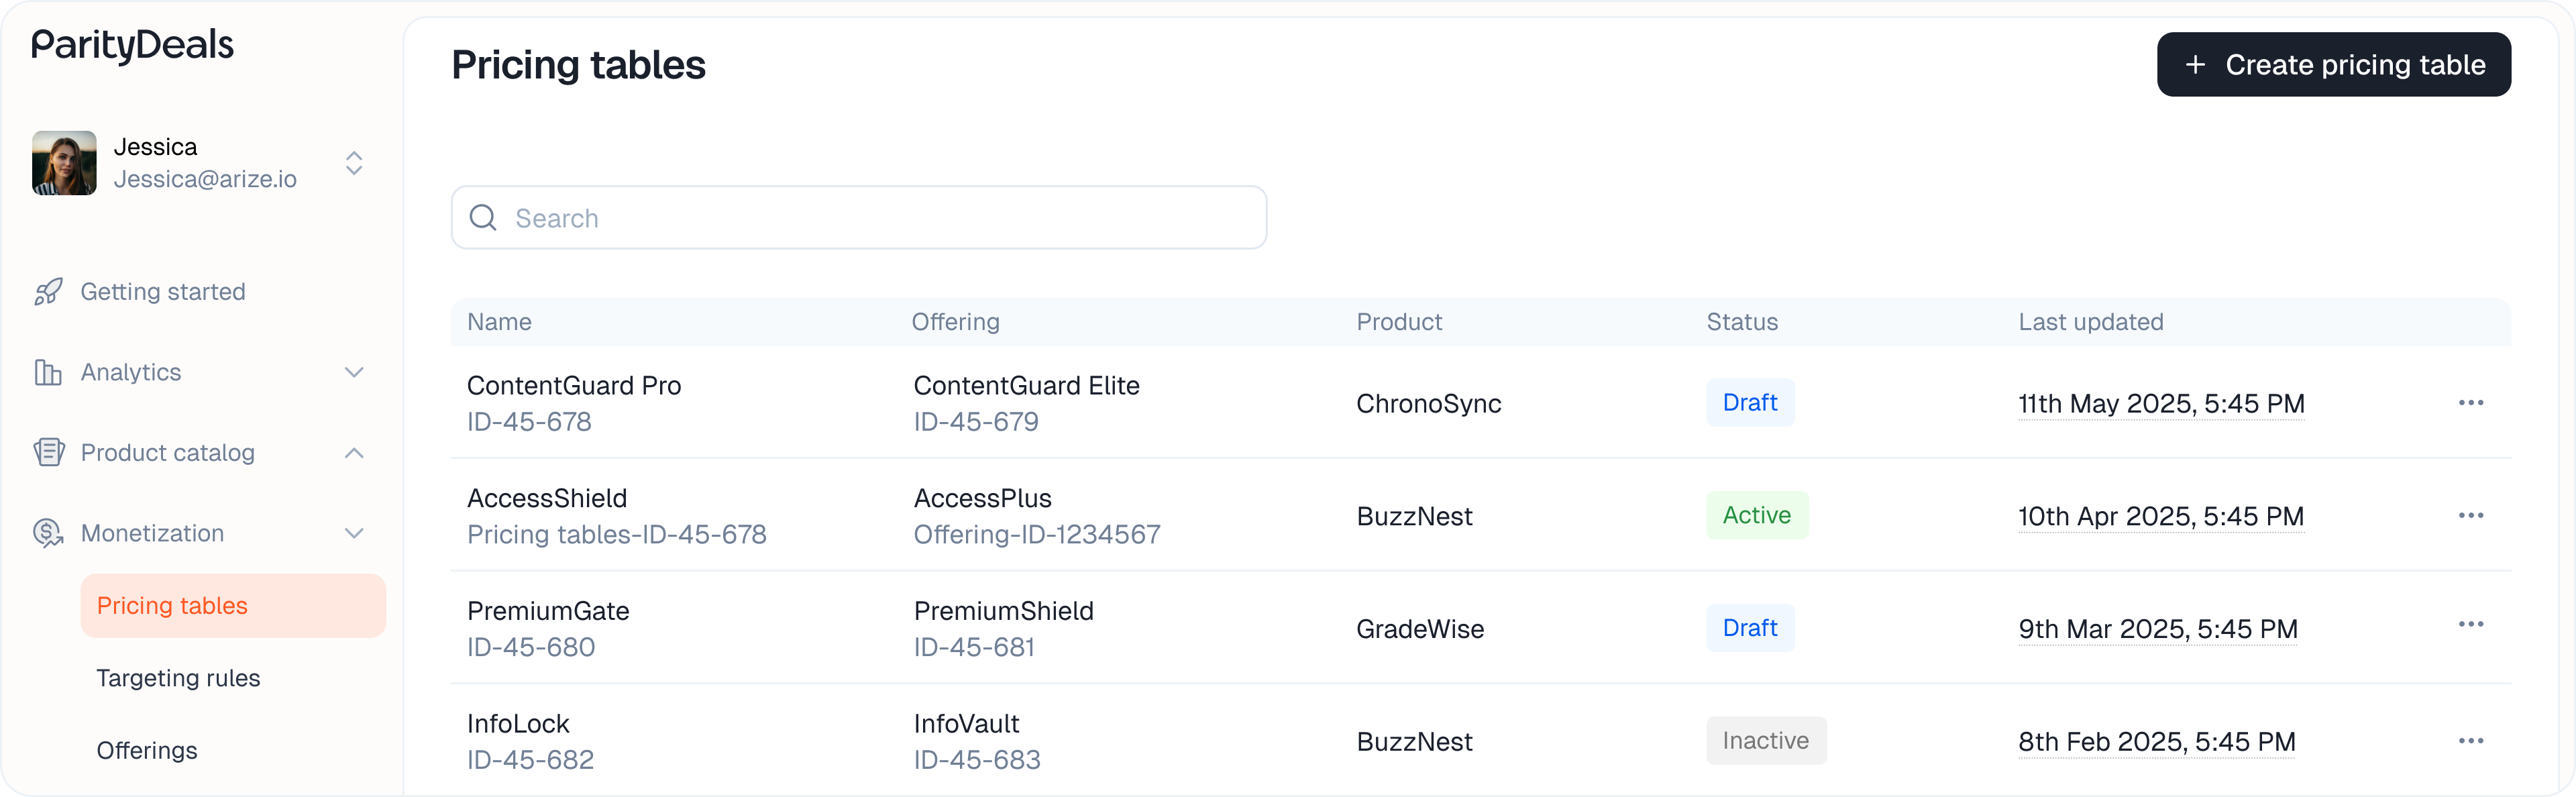
You build and manage your pricing tables within the ParityDeals Dashboard.- From the main sidebar, navigate to Monetization > Pricing tables.
-
On the Pricing tables page, you can see a list of your existing pricing tables or create a new one by clicking the ”+ Create Pricing Table” button. You can start from one of our pre-built templates or design a completely custom experience from scratch.
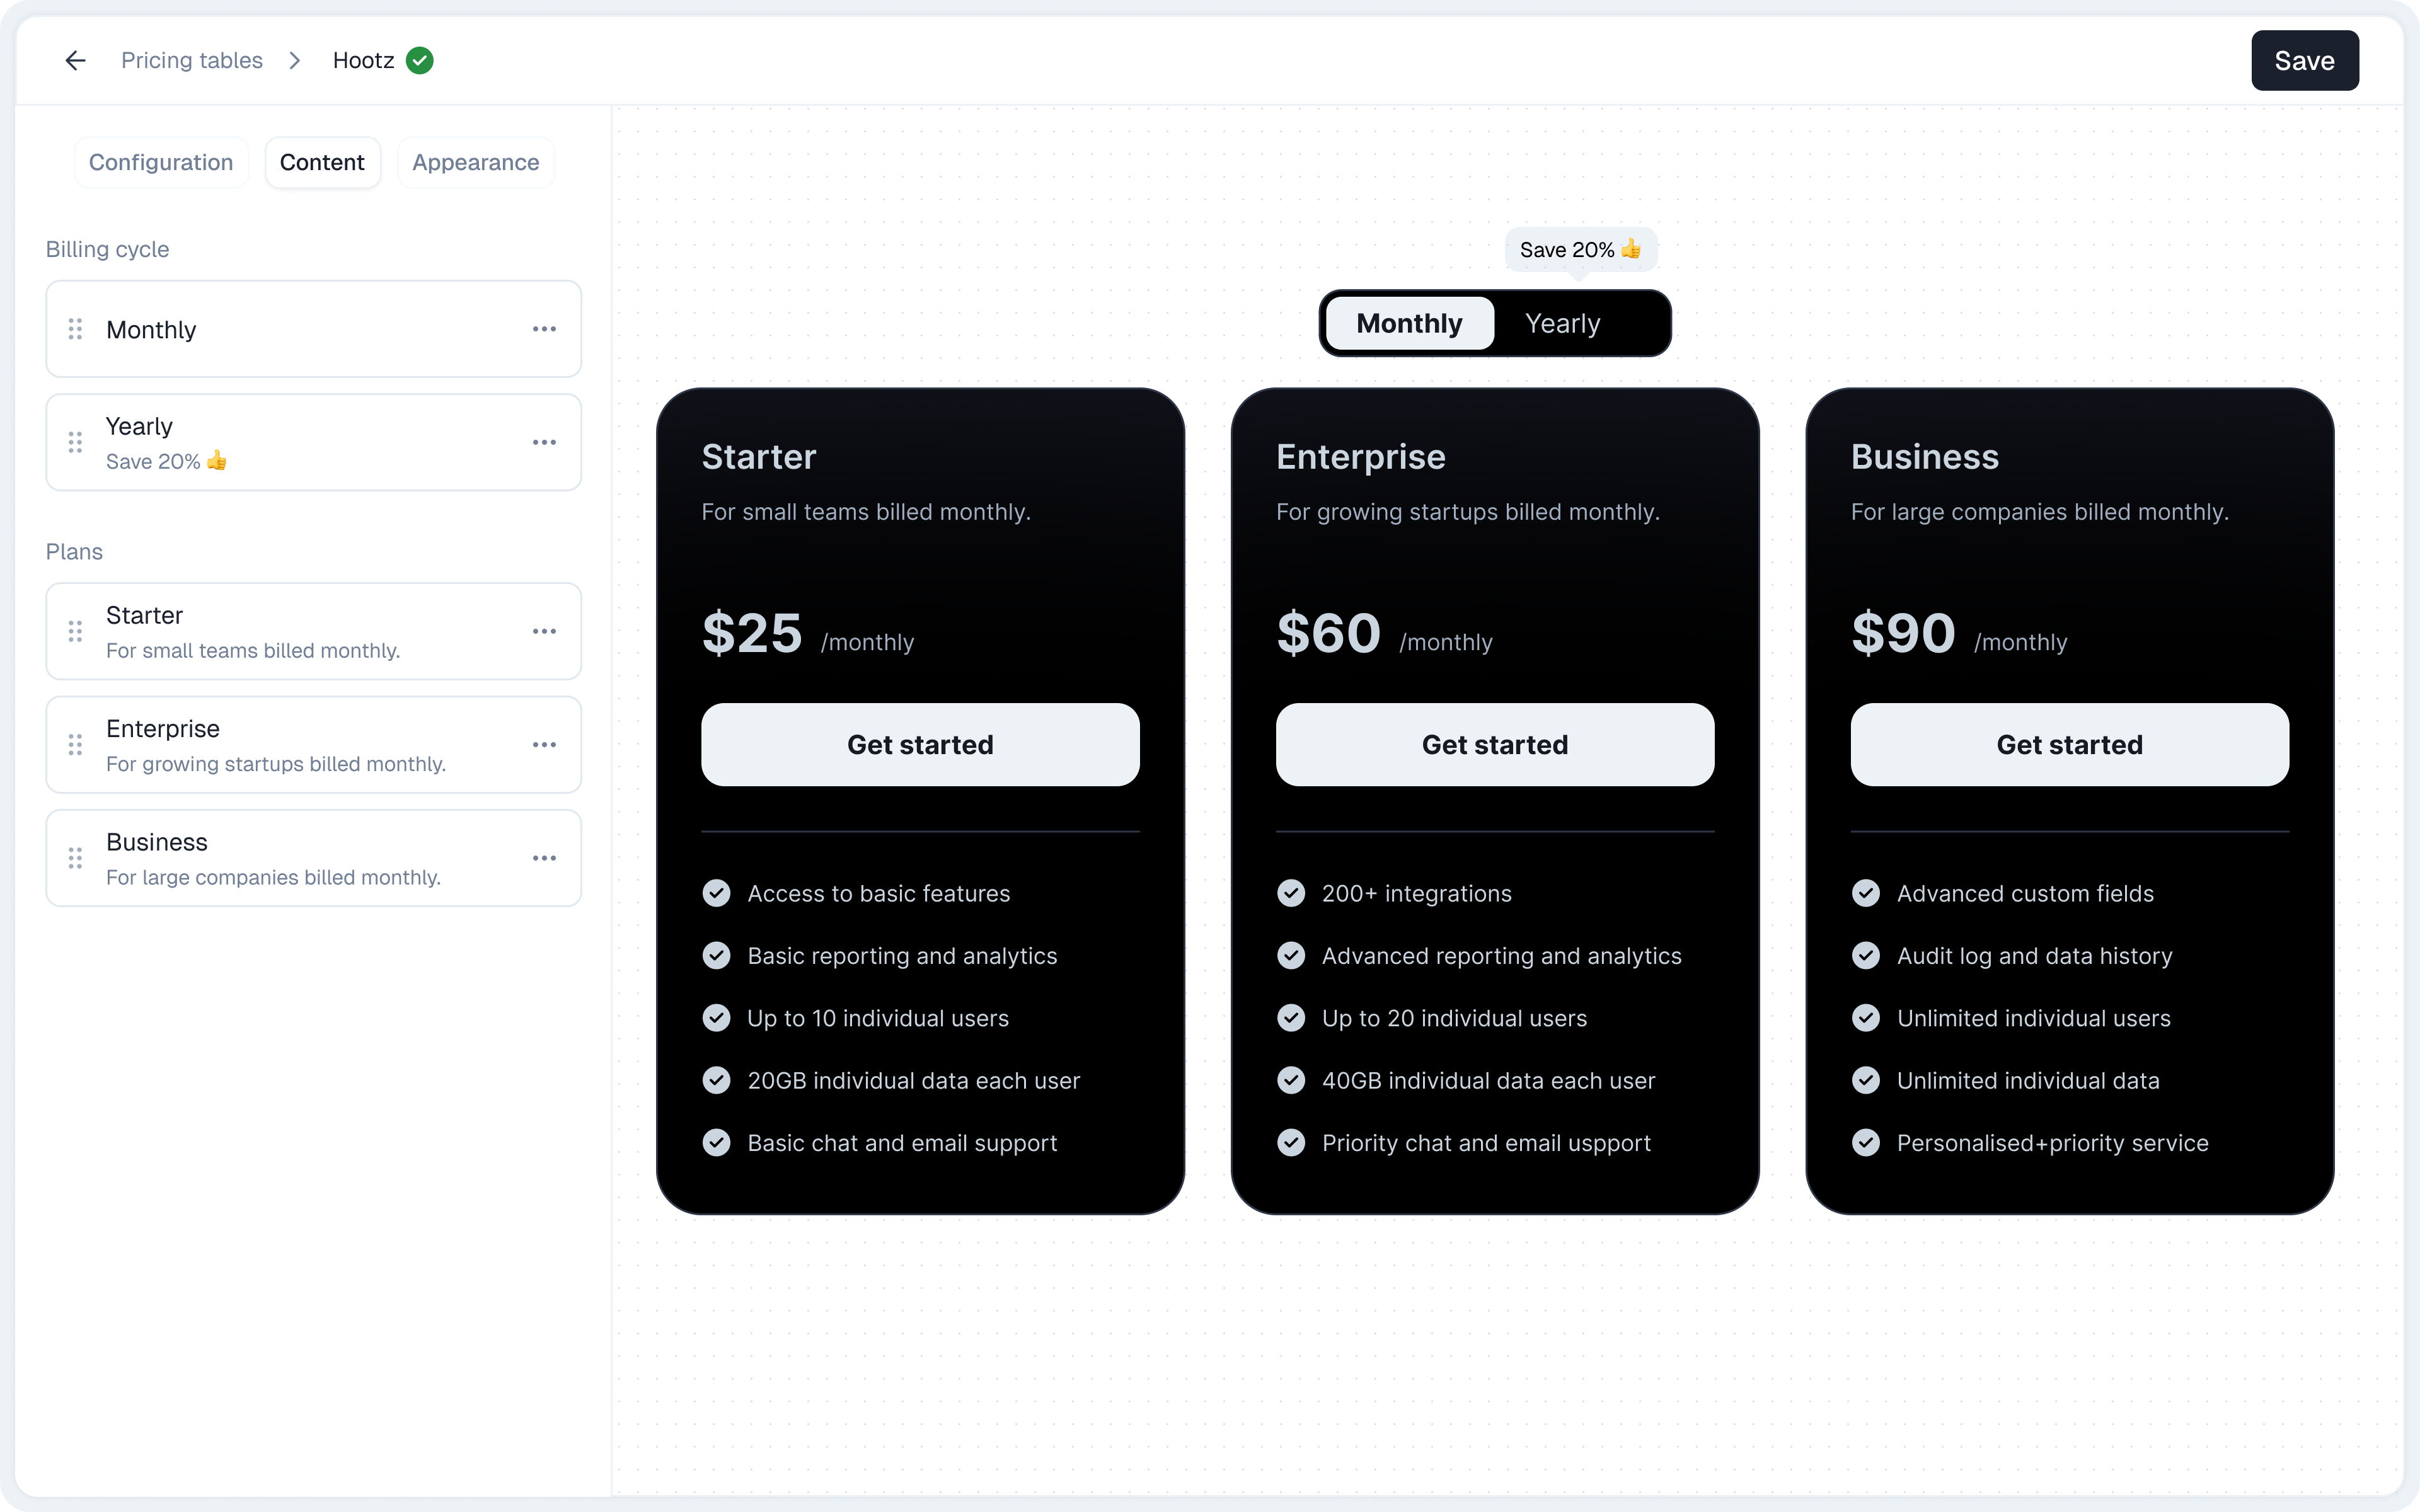
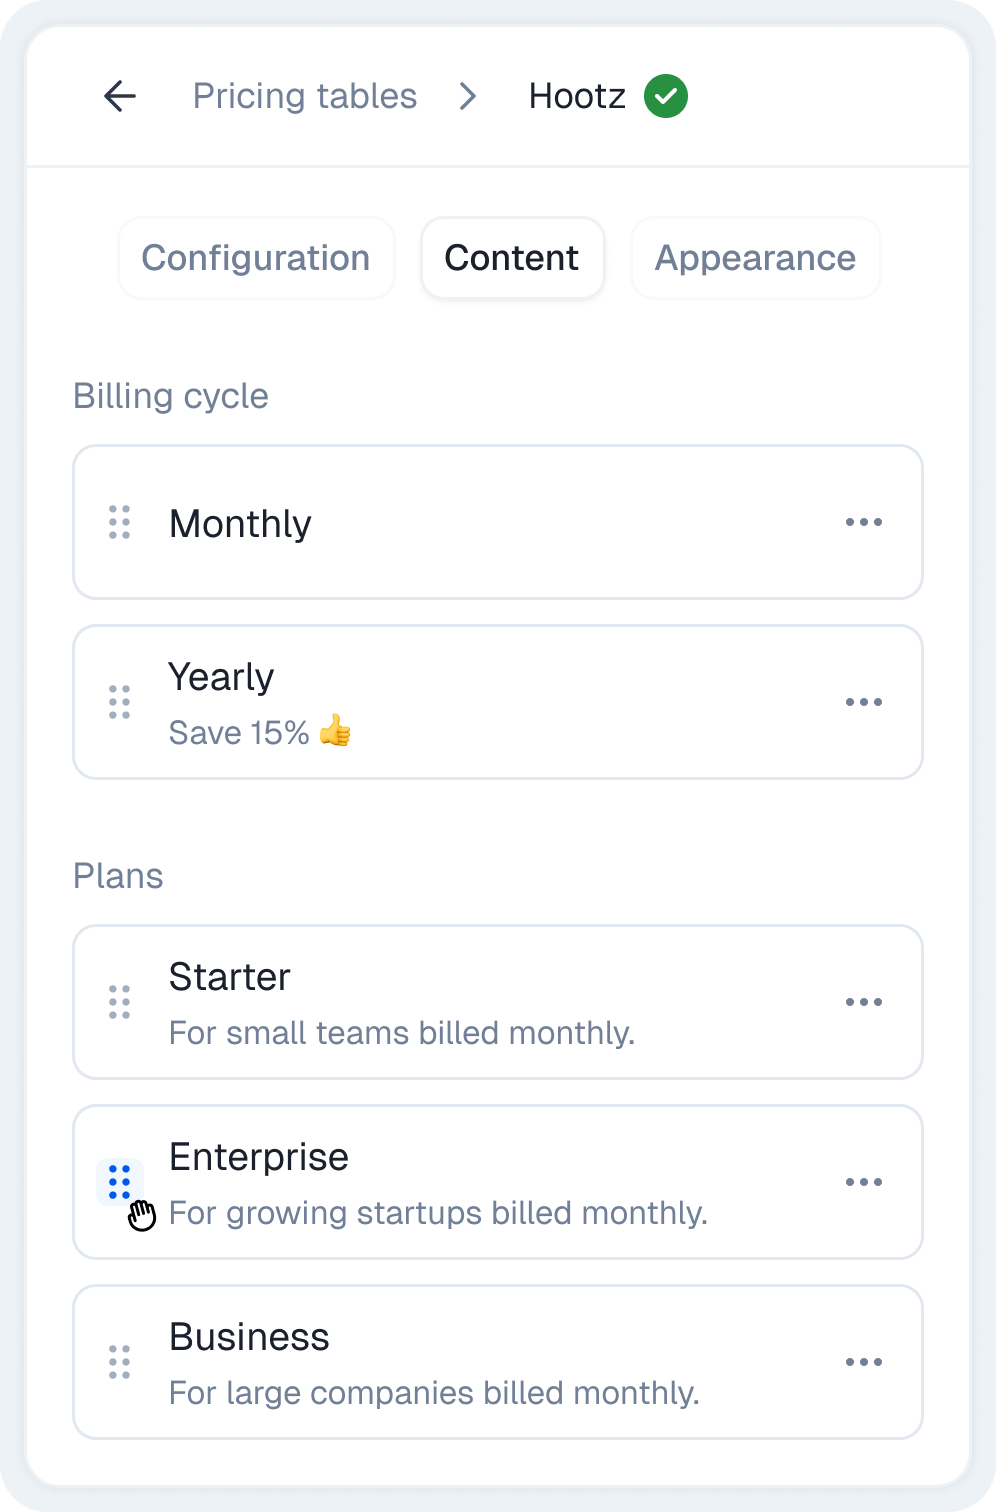
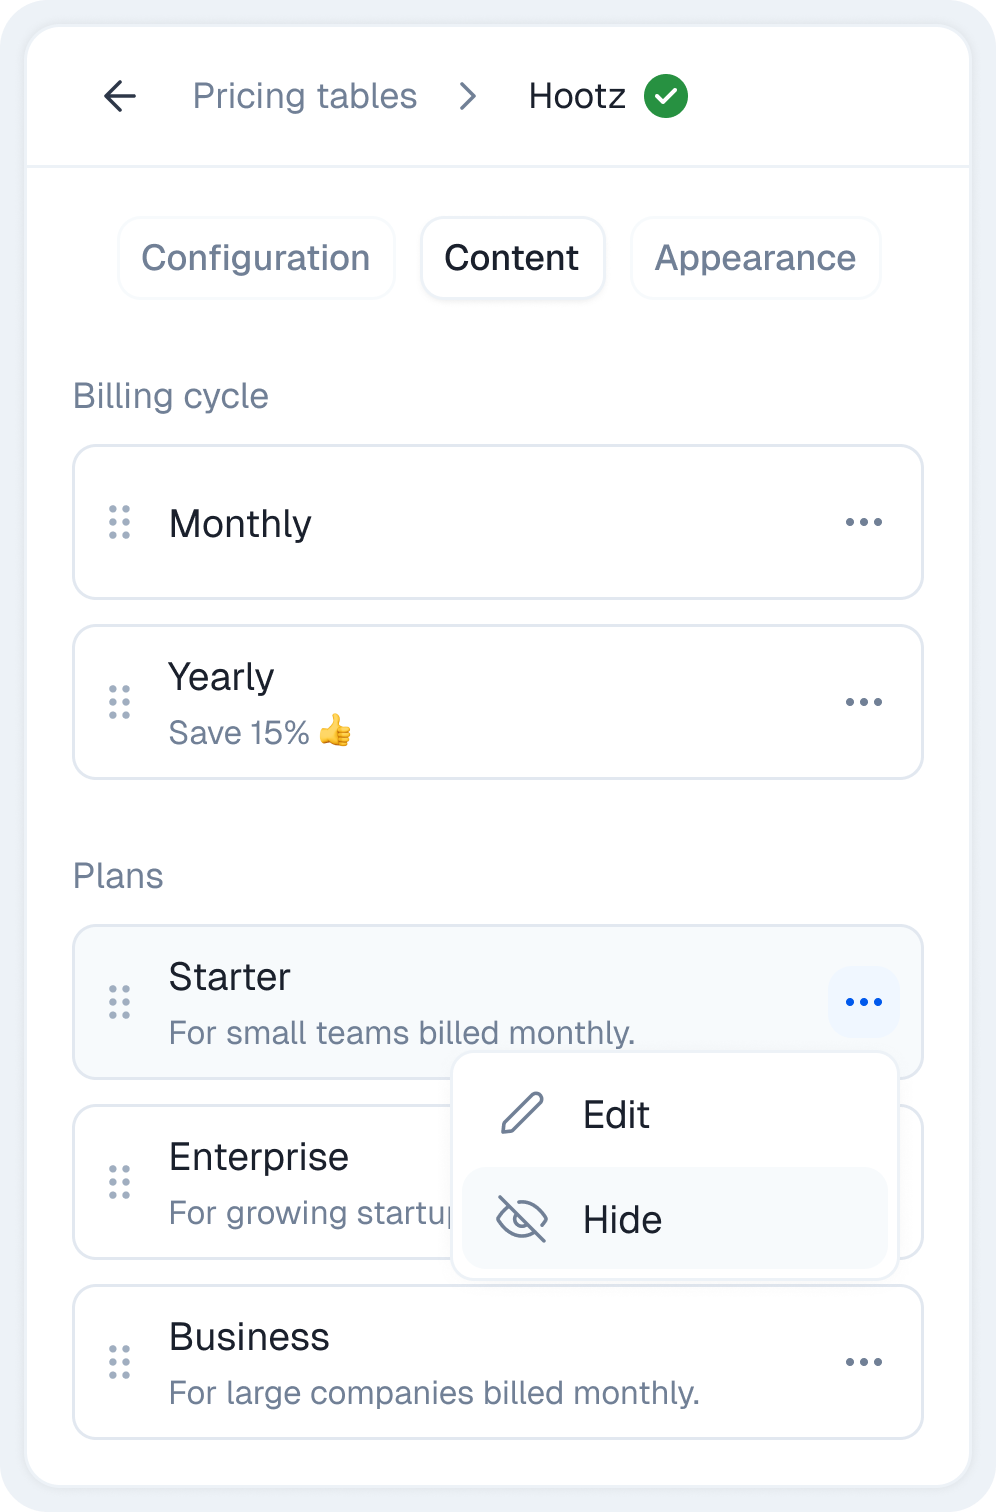
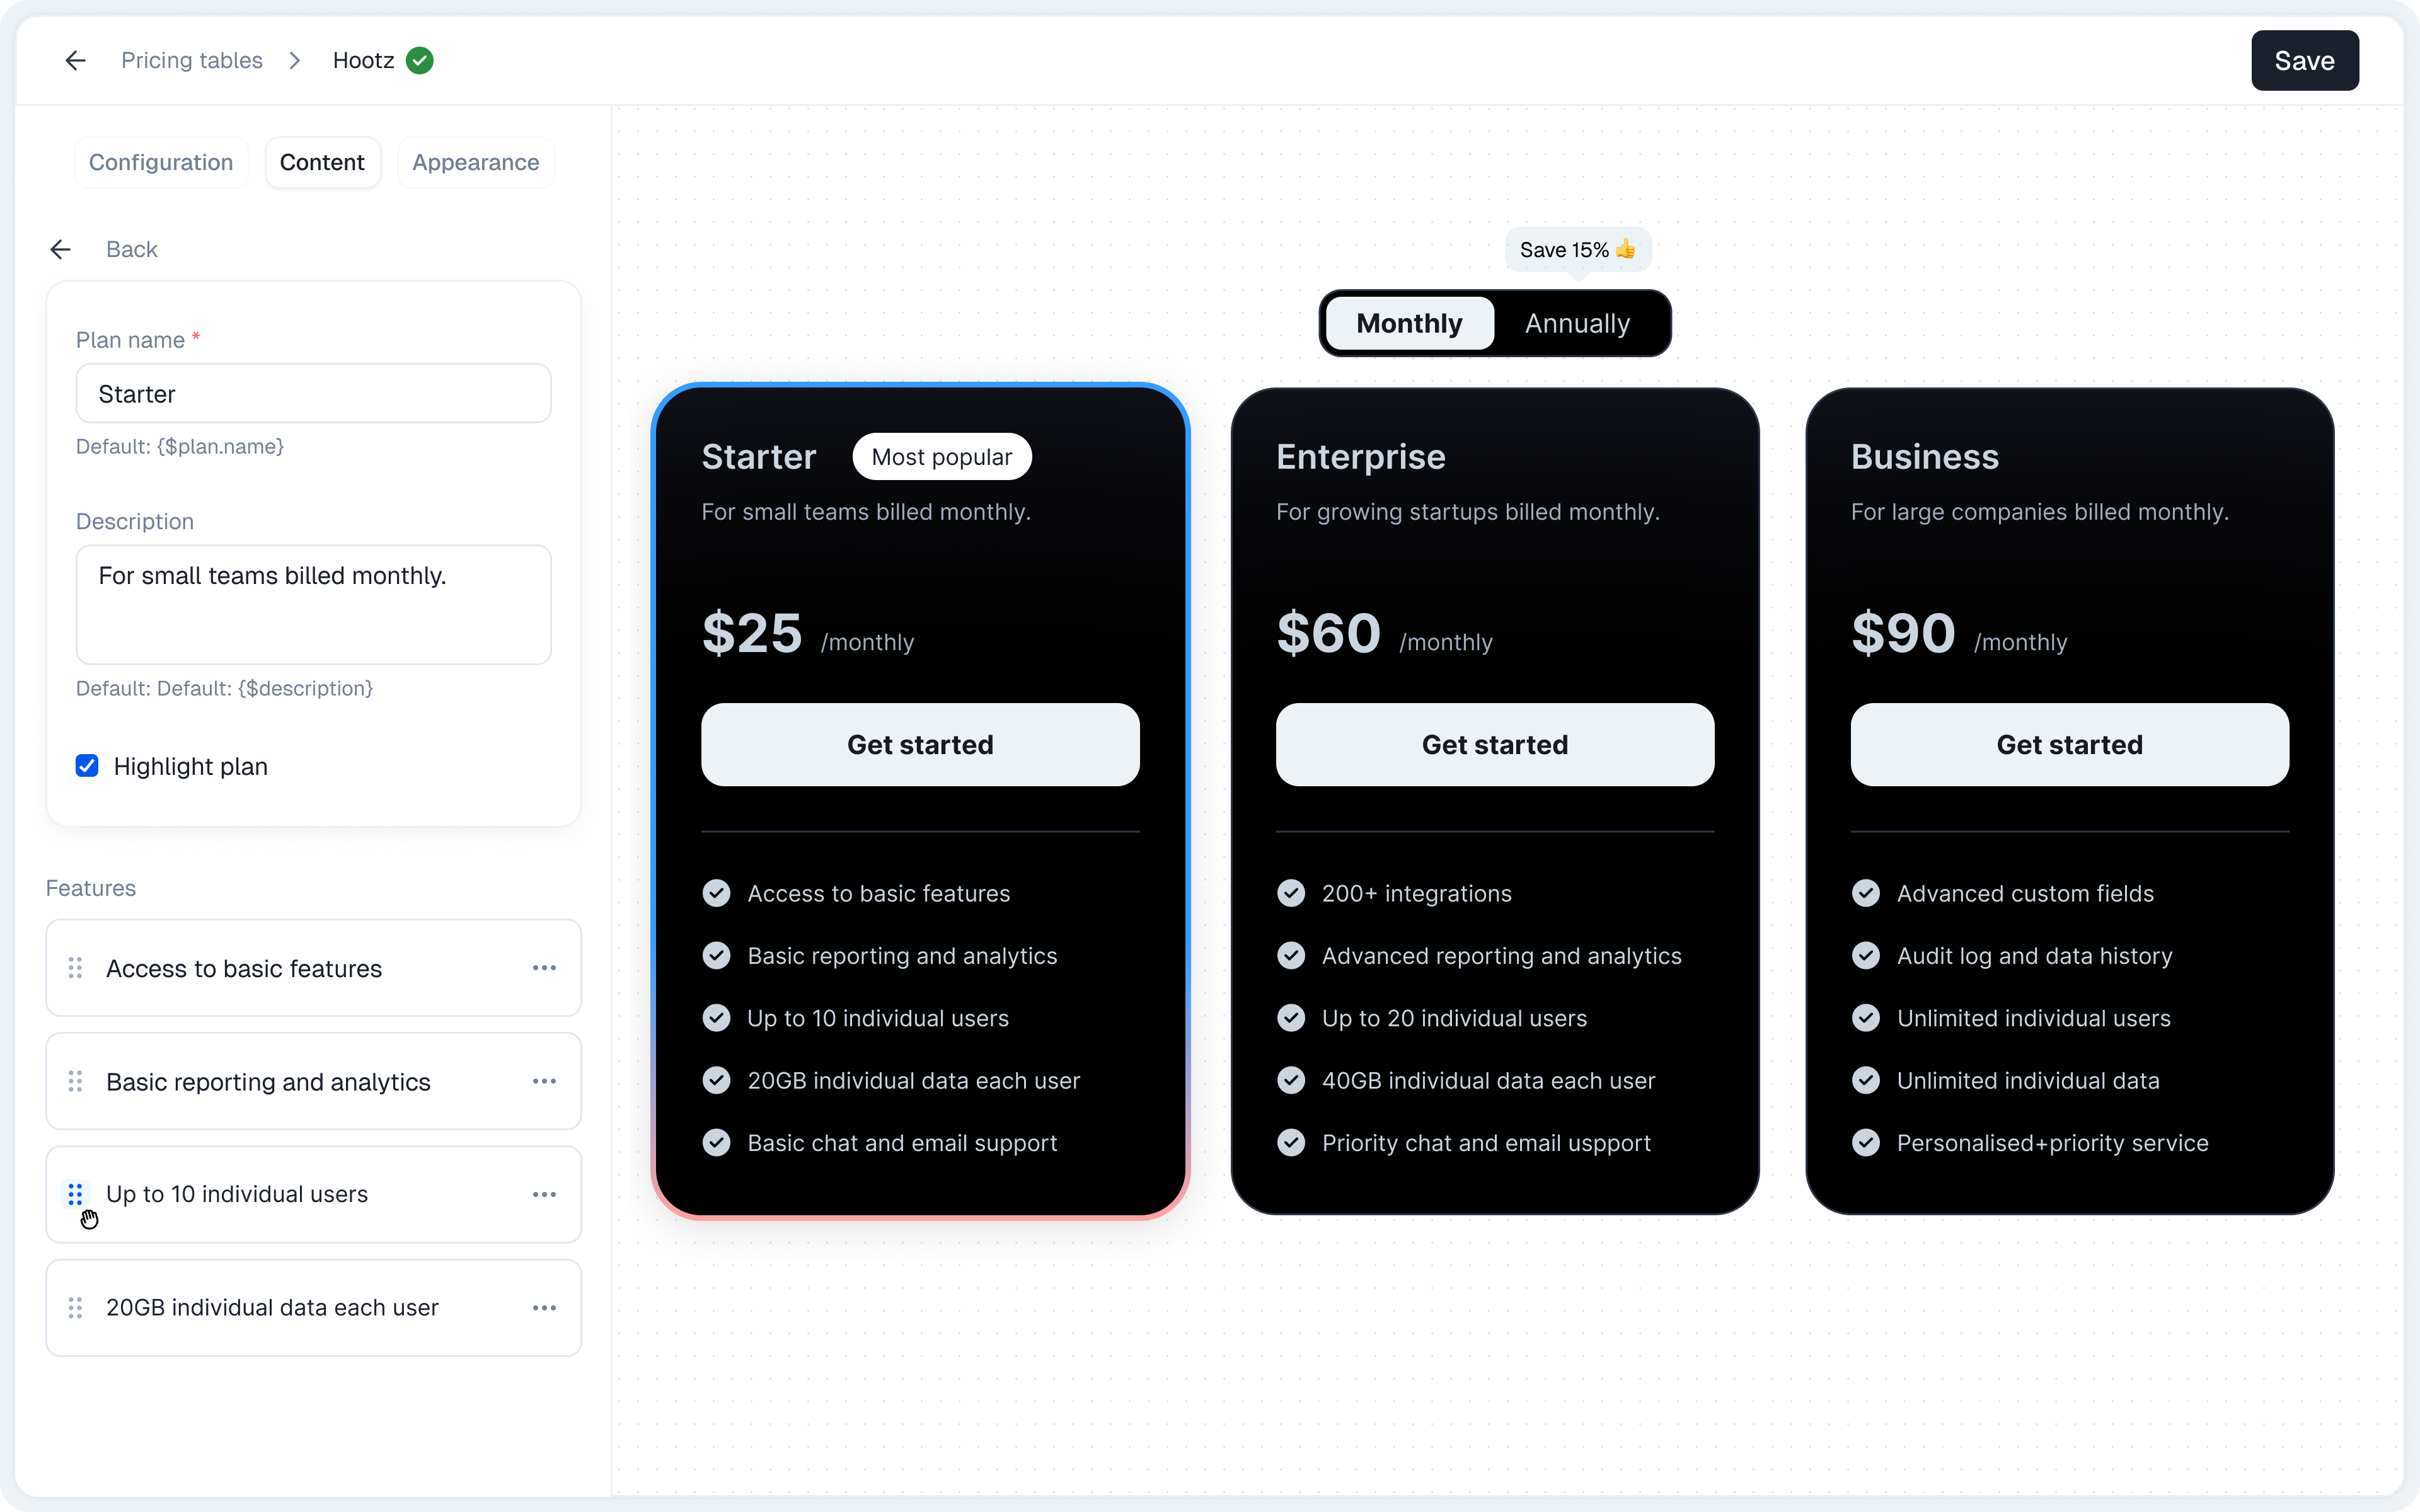
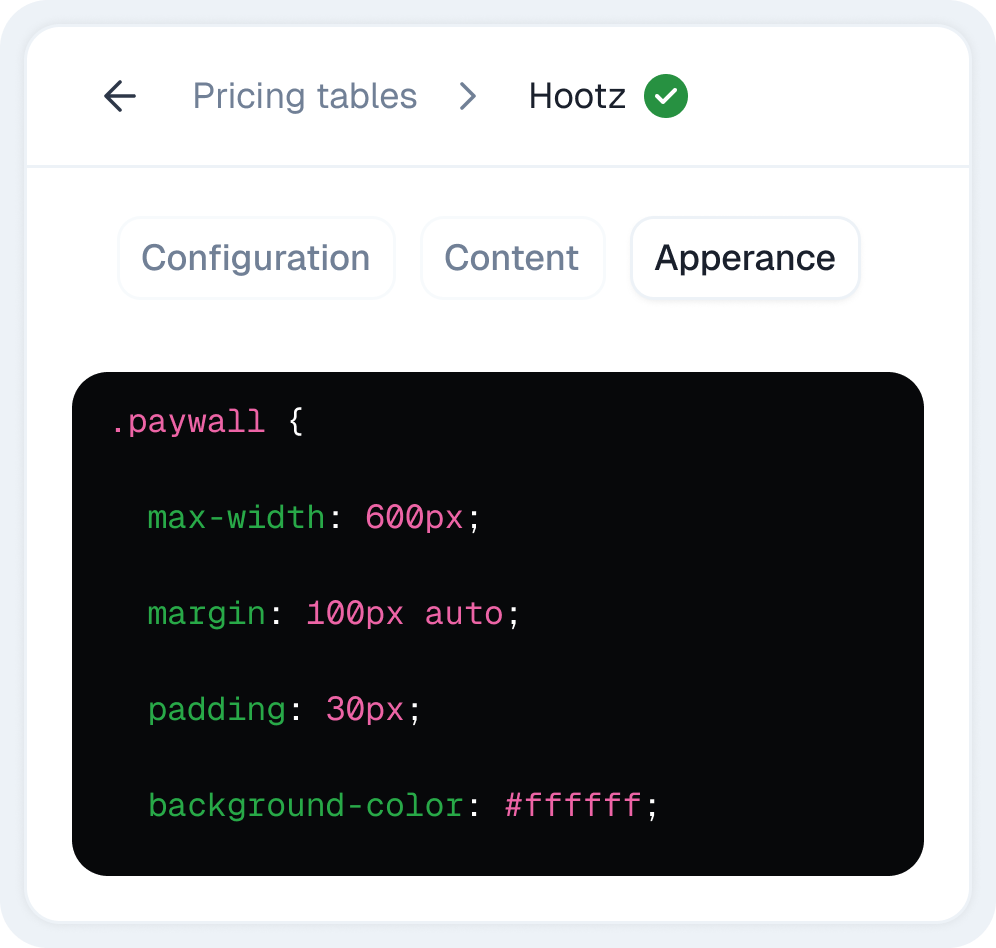
The Pricing table Editor
The Pricing table editor is your central hub for designing and configuring every aspect of your pricing table. It is organized into three main tabs: Configuration, Content, and Appearance.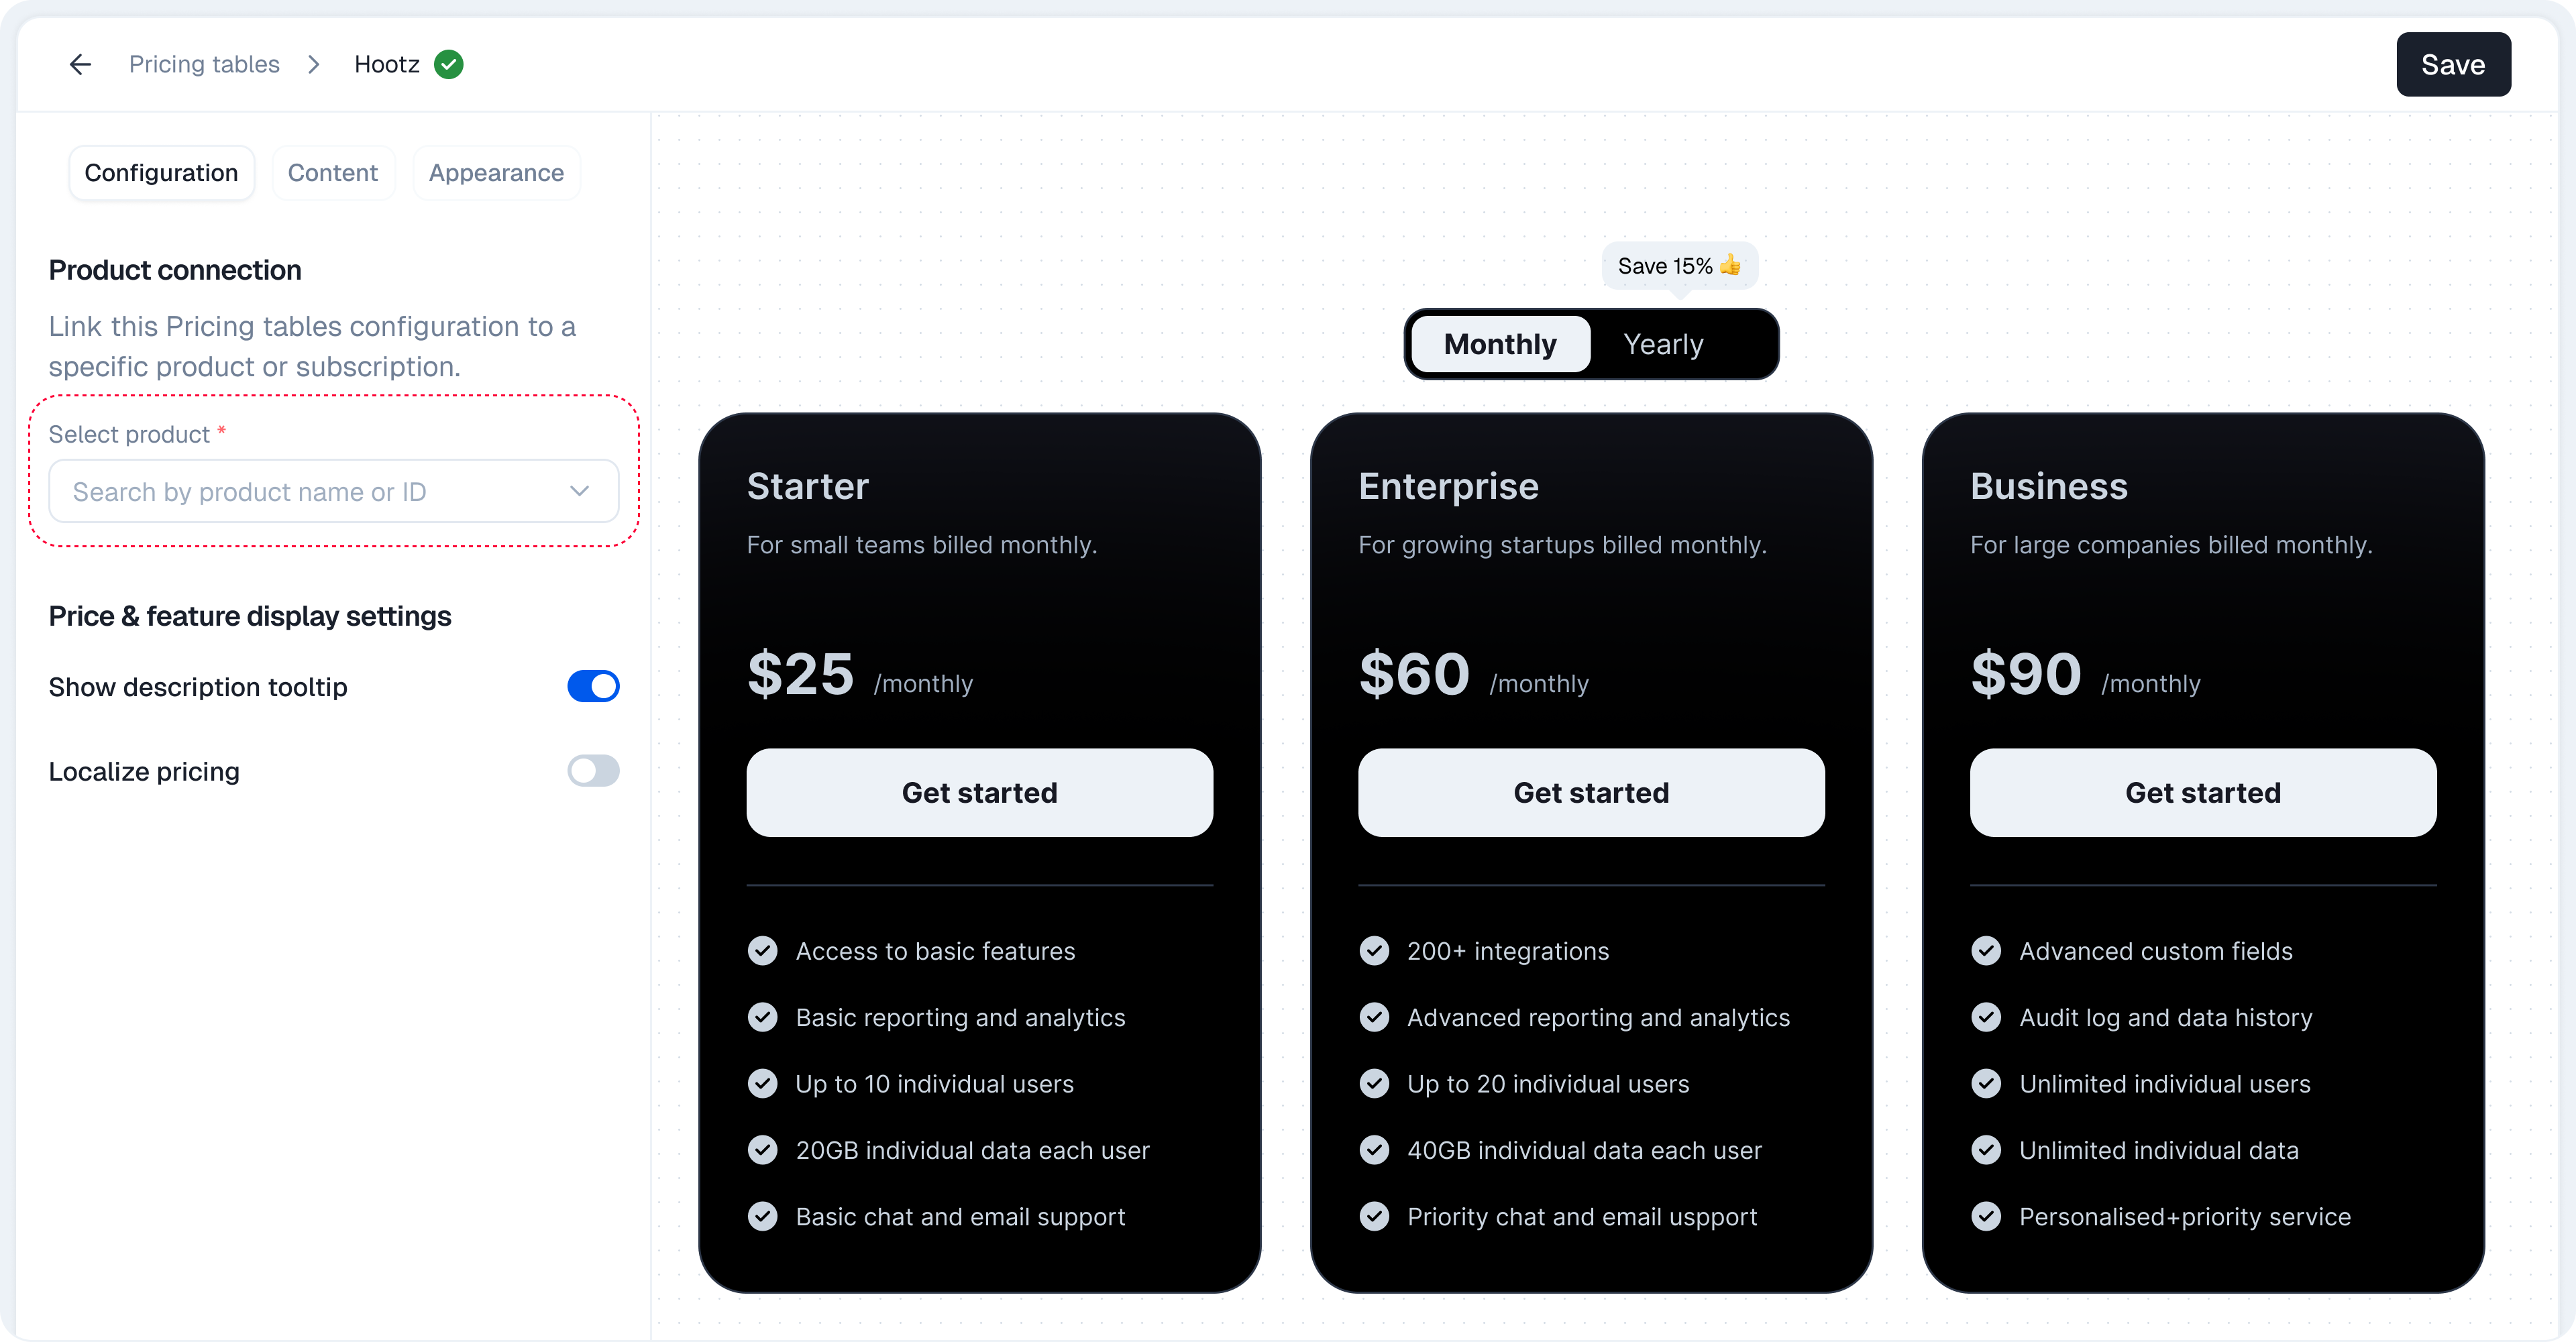
- 1. Configuration
- 2. Content
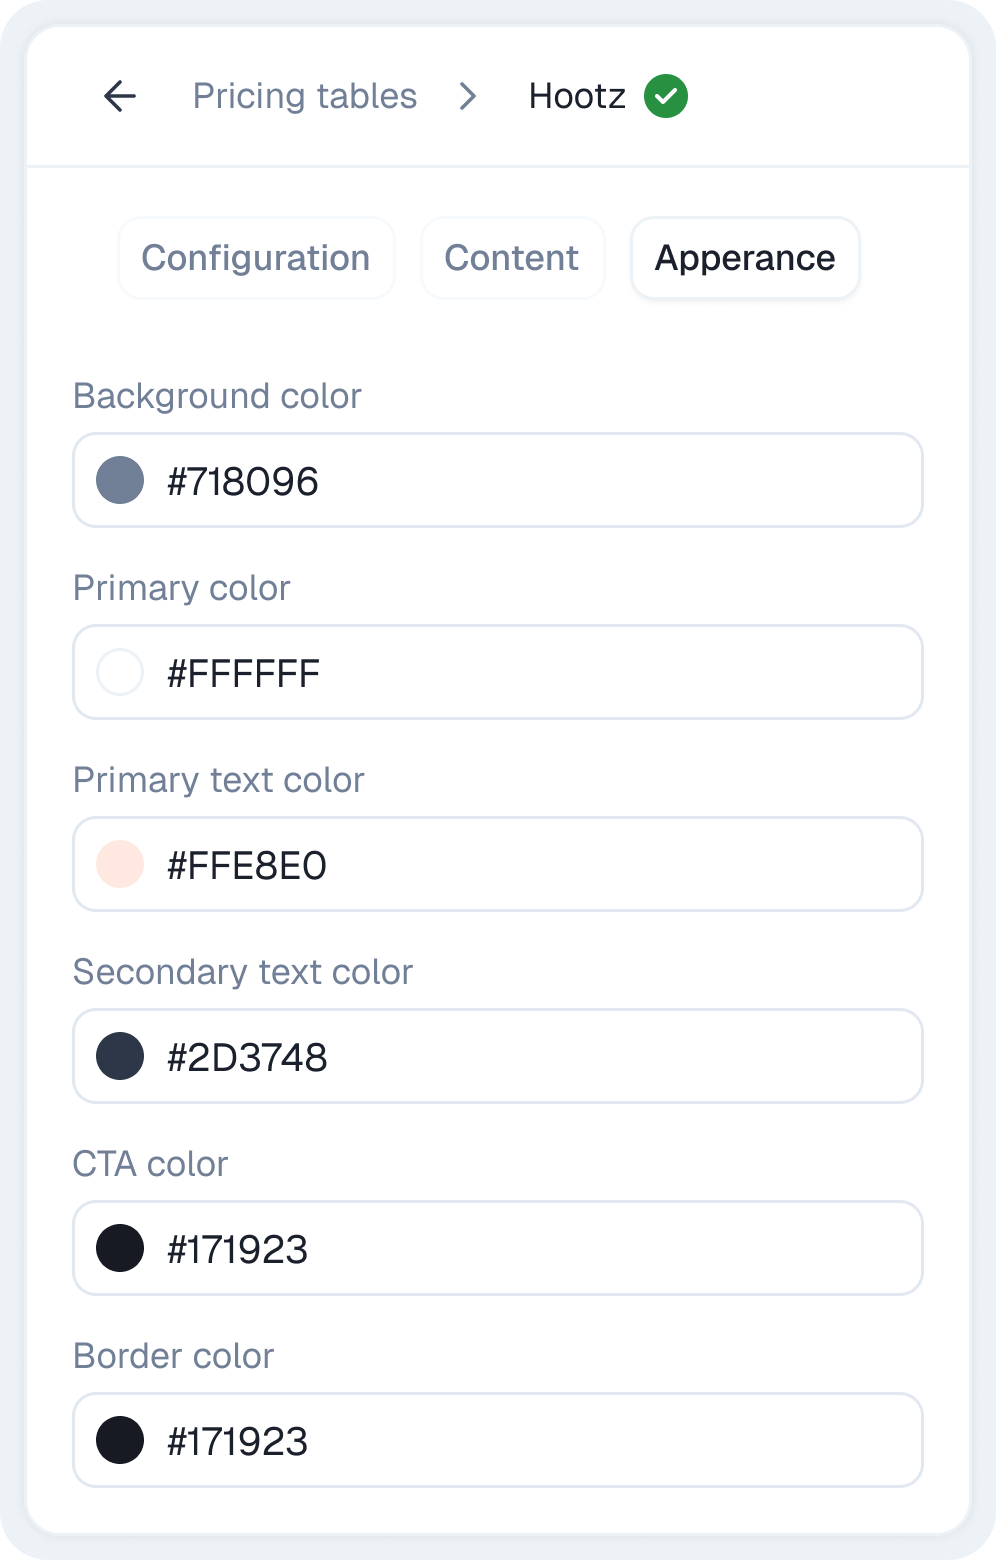
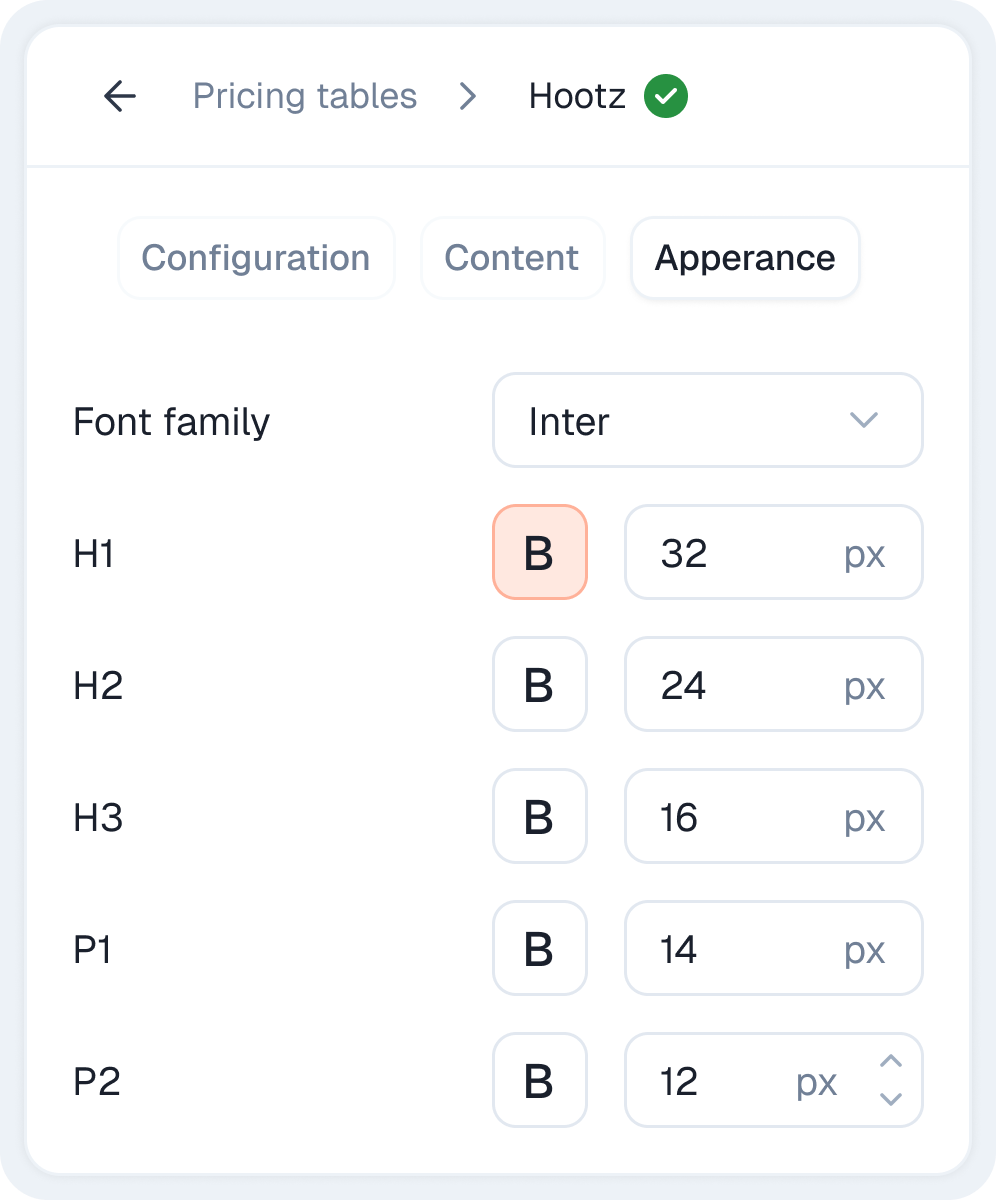
- 3. Appearance
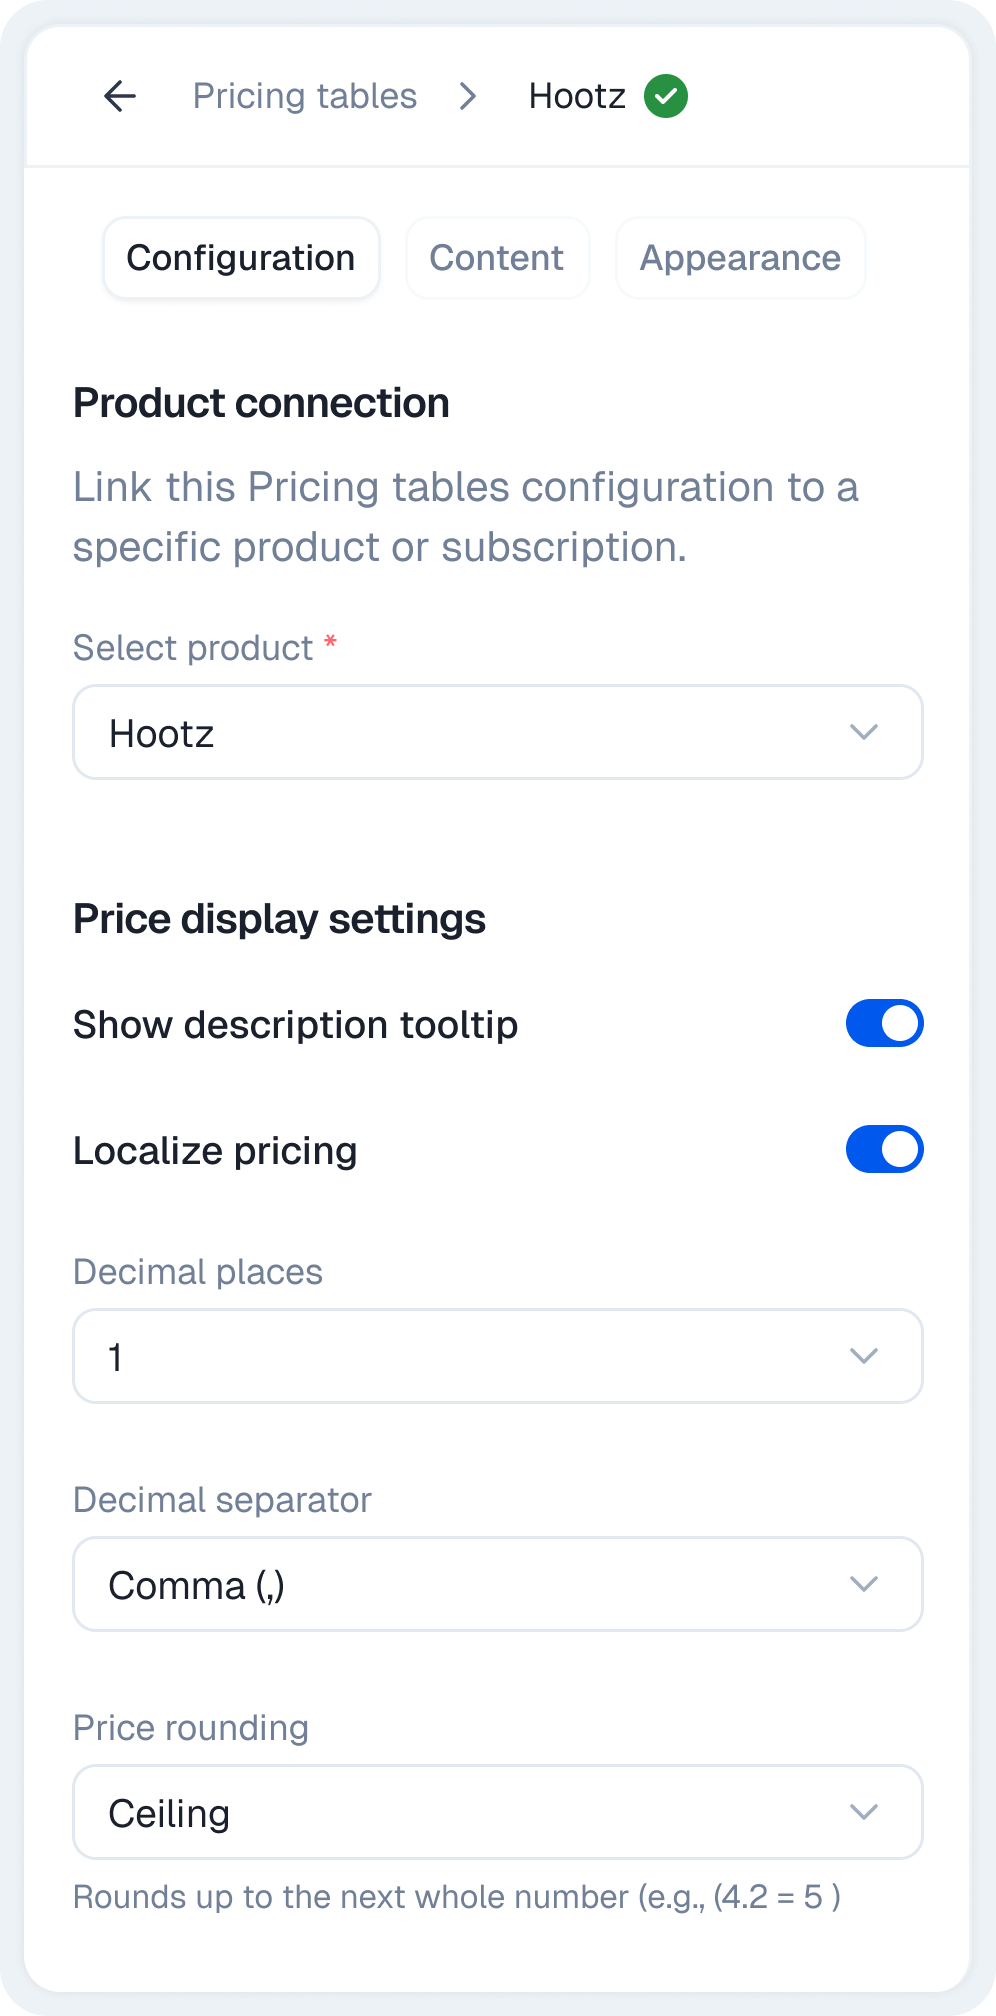
This tab focuses on the foundational settings, linking your pricing table to your product catalog and defining core display and localization rules.
Connecting Your Product
First, you must associate your pricing table with the product whose plans and features it will display.-
Product Connection: From the dropdown menu, select the relevant product from your catalog. This action dynamically links the pricing table to that product’s specific set of plans and features.
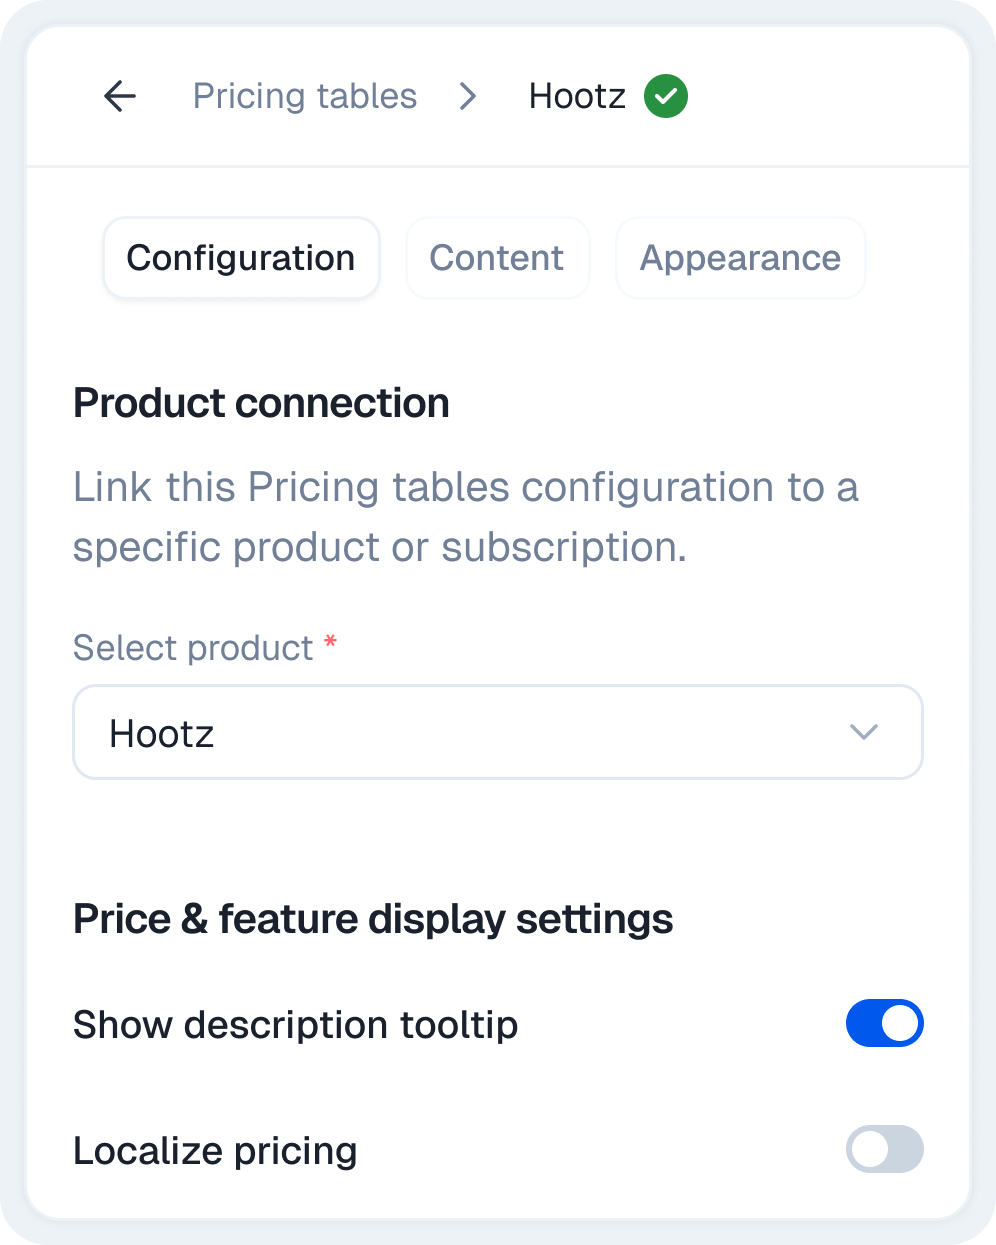
Price & Feature Display Settings
Control how detailed information about pricing and features is presented to the user.- Display Prices & Features: This toggle (enabled by default) determines if the detailed pricing information (e.g., price per month) and the lists of features associated with each plan are shown on the pricing table.
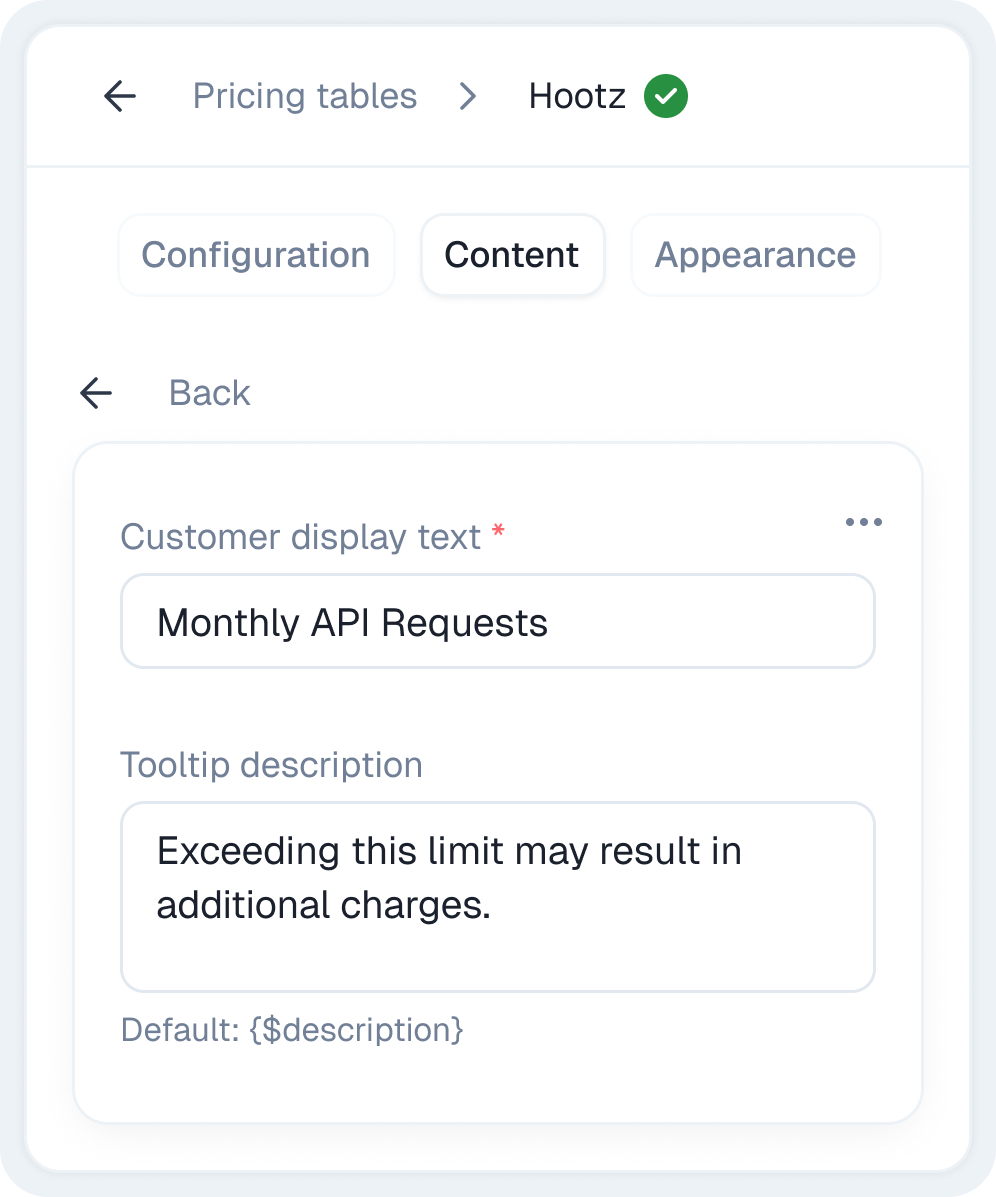
- Show Feature Description Tooltip: When enabled, an info icon (ⓘ) will appear next to features in the plan list. Hovering over this icon will display a tooltip containing the feature’s description (as defined in your Product Catalog).
Localization & Formatting
Configure how pricing information is adapted for different locales and user preferences.- Localize Pricing: This toggle (disabled by default) enables ParityDeals to attempt displaying prices in the user’s local currency, based on their region.
-
Decimal Places: Choose the number of decimal places to display for prices (e.g.,
0for$10,1for$10.0,2for$10.00). -
Decimal Separator: Select the character used as the decimal separator (e.g., Dot
.for$10.00or Comma,for$10,00). -
Price Rounding: Define how prices are rounded if they result in fractions after currency conversion or specific calculations:
Ceiling: Always rounds up to the next whole number (e.g.,4.2becomes5).Floor: Always rounds down to the previous whole number (e.g.,4.2becomes4).Round to nearest: Rounds to the closest whole number (e.g.,4.2≈4,4.6≈5).


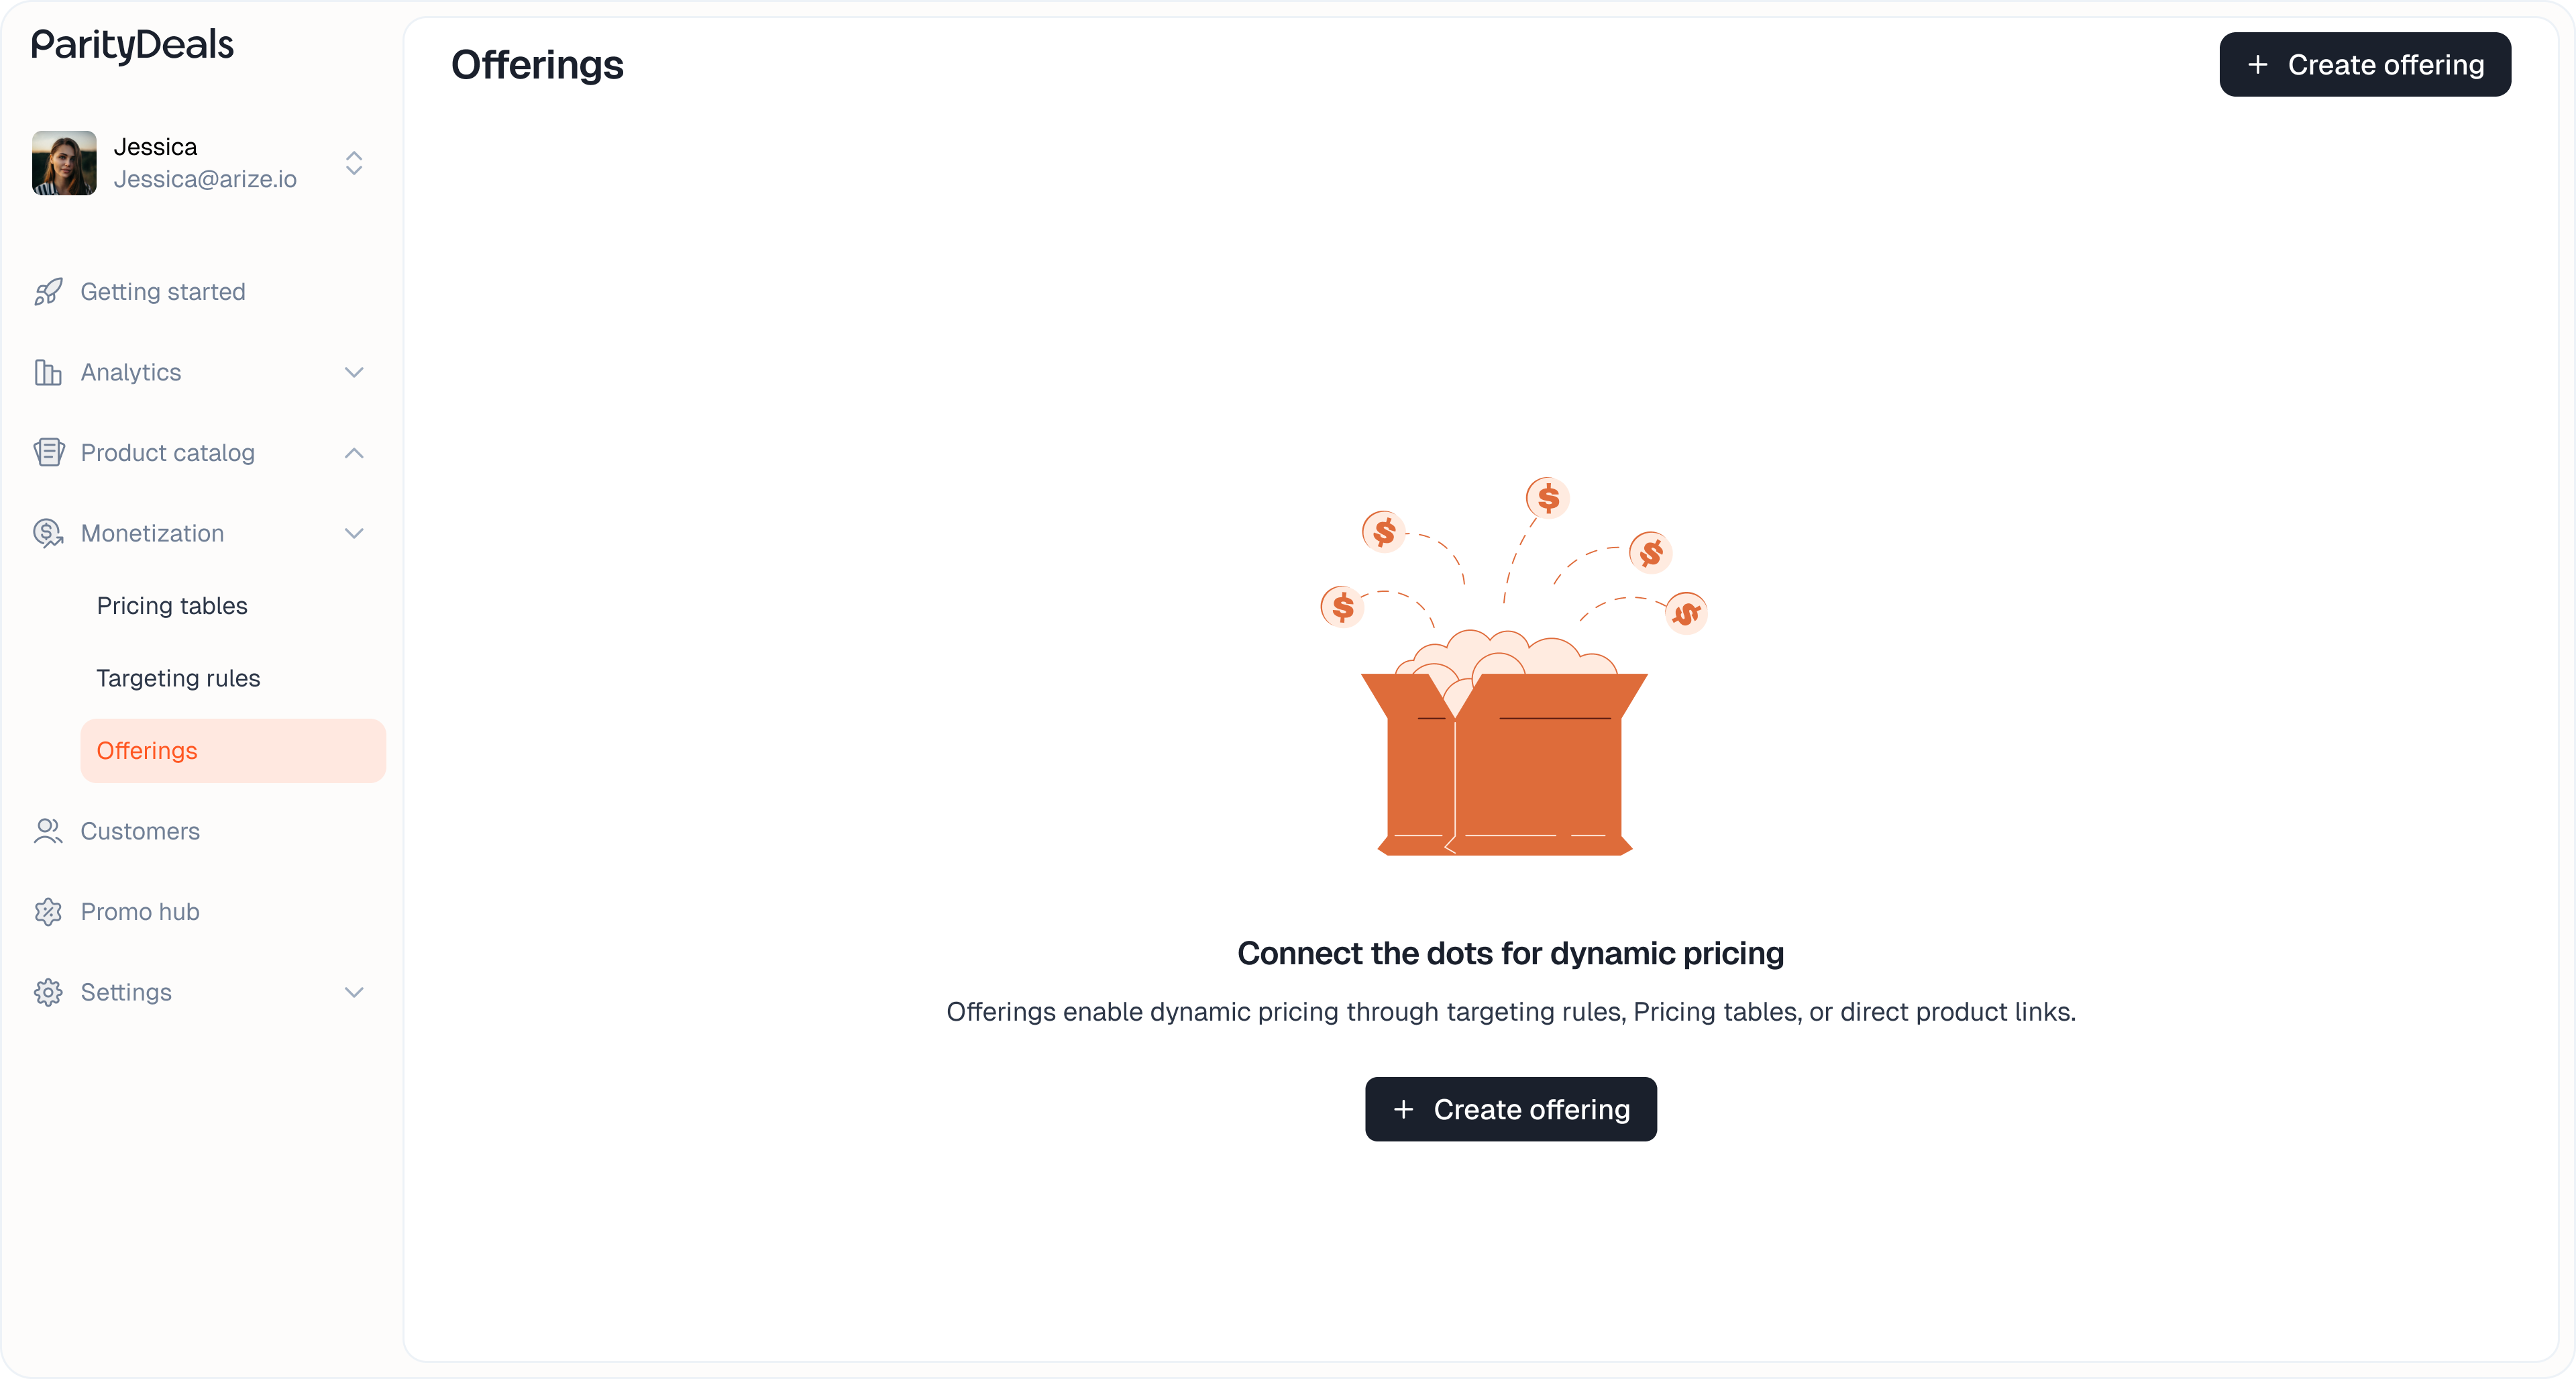
Connecting Pricing tables to Offerings
Once your pricing table is designed and saved, it doesn’t automatically appear to users. You need to link it to an Offering to control who sees it and under what conditions.What is an Offering?
An Offering in ParityDeals is a powerful entity that determines precisely what pricing table (and therefore which set of plans and pricing) a specific user or user segment is presented with. Offerings are the bridge between your pricing table designs and your live application. They enable you to:- Remotely control the entire pricing table experience without deploying new code.
- Define a specific set of packages (plans) and associated metadata that are shown on a pricing table.
- Implement dynamic pricing strategies by linking pricing tables to Targeting Rules. This allows you to show different pricing tables and pricing to different users based on attributes like their geographic location (for PPP pricing), device type, or other custom criteria.
- Link pricing tables directly to specific products for simpler, non-targeted scenarios.
Creating an Offering for Your Pricing table
- From the main sidebar, navigate to Monetization > Offerings.
-
Click the ”+ Create offering” button.
-
In the “Create offering” modal that appears:
- Select a Pricing Table: From the “Select Pricing Table” dropdown menu, choose the pricing table design you want this Offering to display. Selecting a Pricing Table is the primary step, as it contains the product and plans to be shown.
- Select a Targeting Rule (Optional): If you want to apply dynamic pricing adjustments (like PPP or country-specific discounts) to the selected pricing table, choose a rule from the “Select Targeting Rule” dropdown. If this field is left empty, the pricing table will be displayed with its default pricing to all users. If you select a rule, its logic will be applied to the prices shown on the pricing table for any user who matches the rule’s conditions.
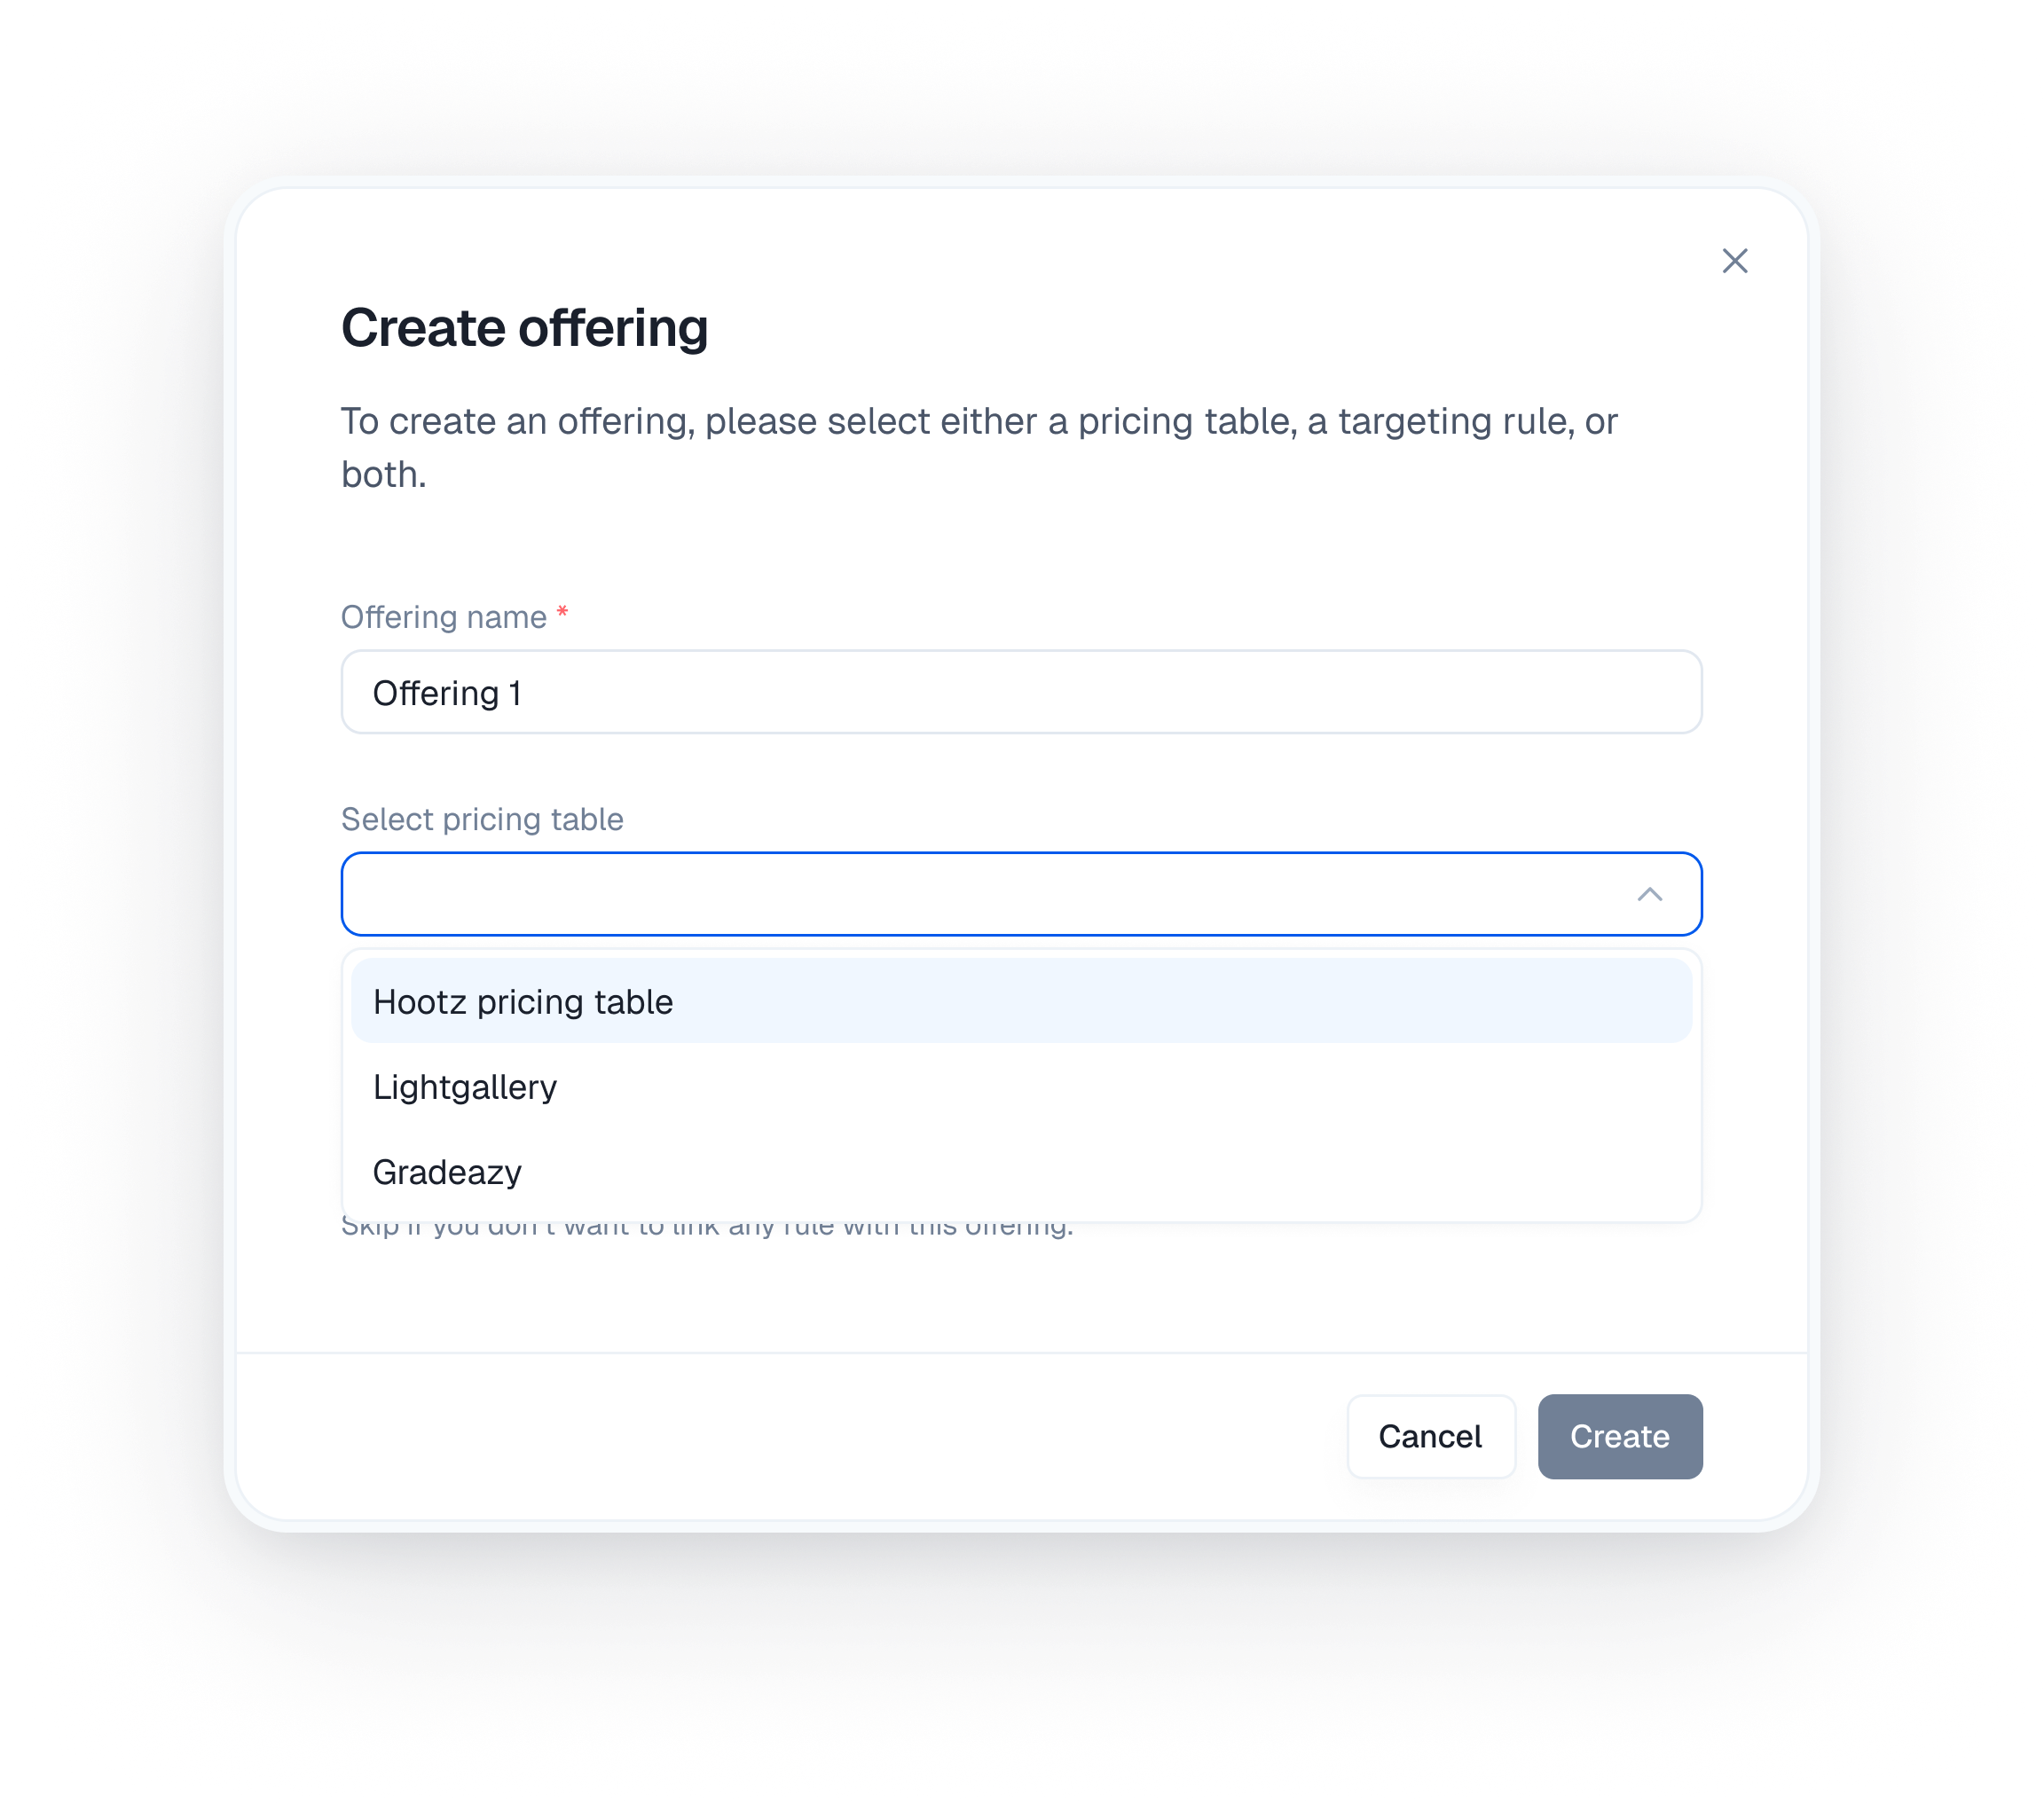
- Click “Create”.
Using the Offering ID
The most crucial piece of information for integration is the Offering ID. Once you hit Create, the modal will display the Offering ID — this is the key you’ll need to copy and paste directly into your codebase to complete the integration. You can always retrieve the Offering ID later from the Offering list page.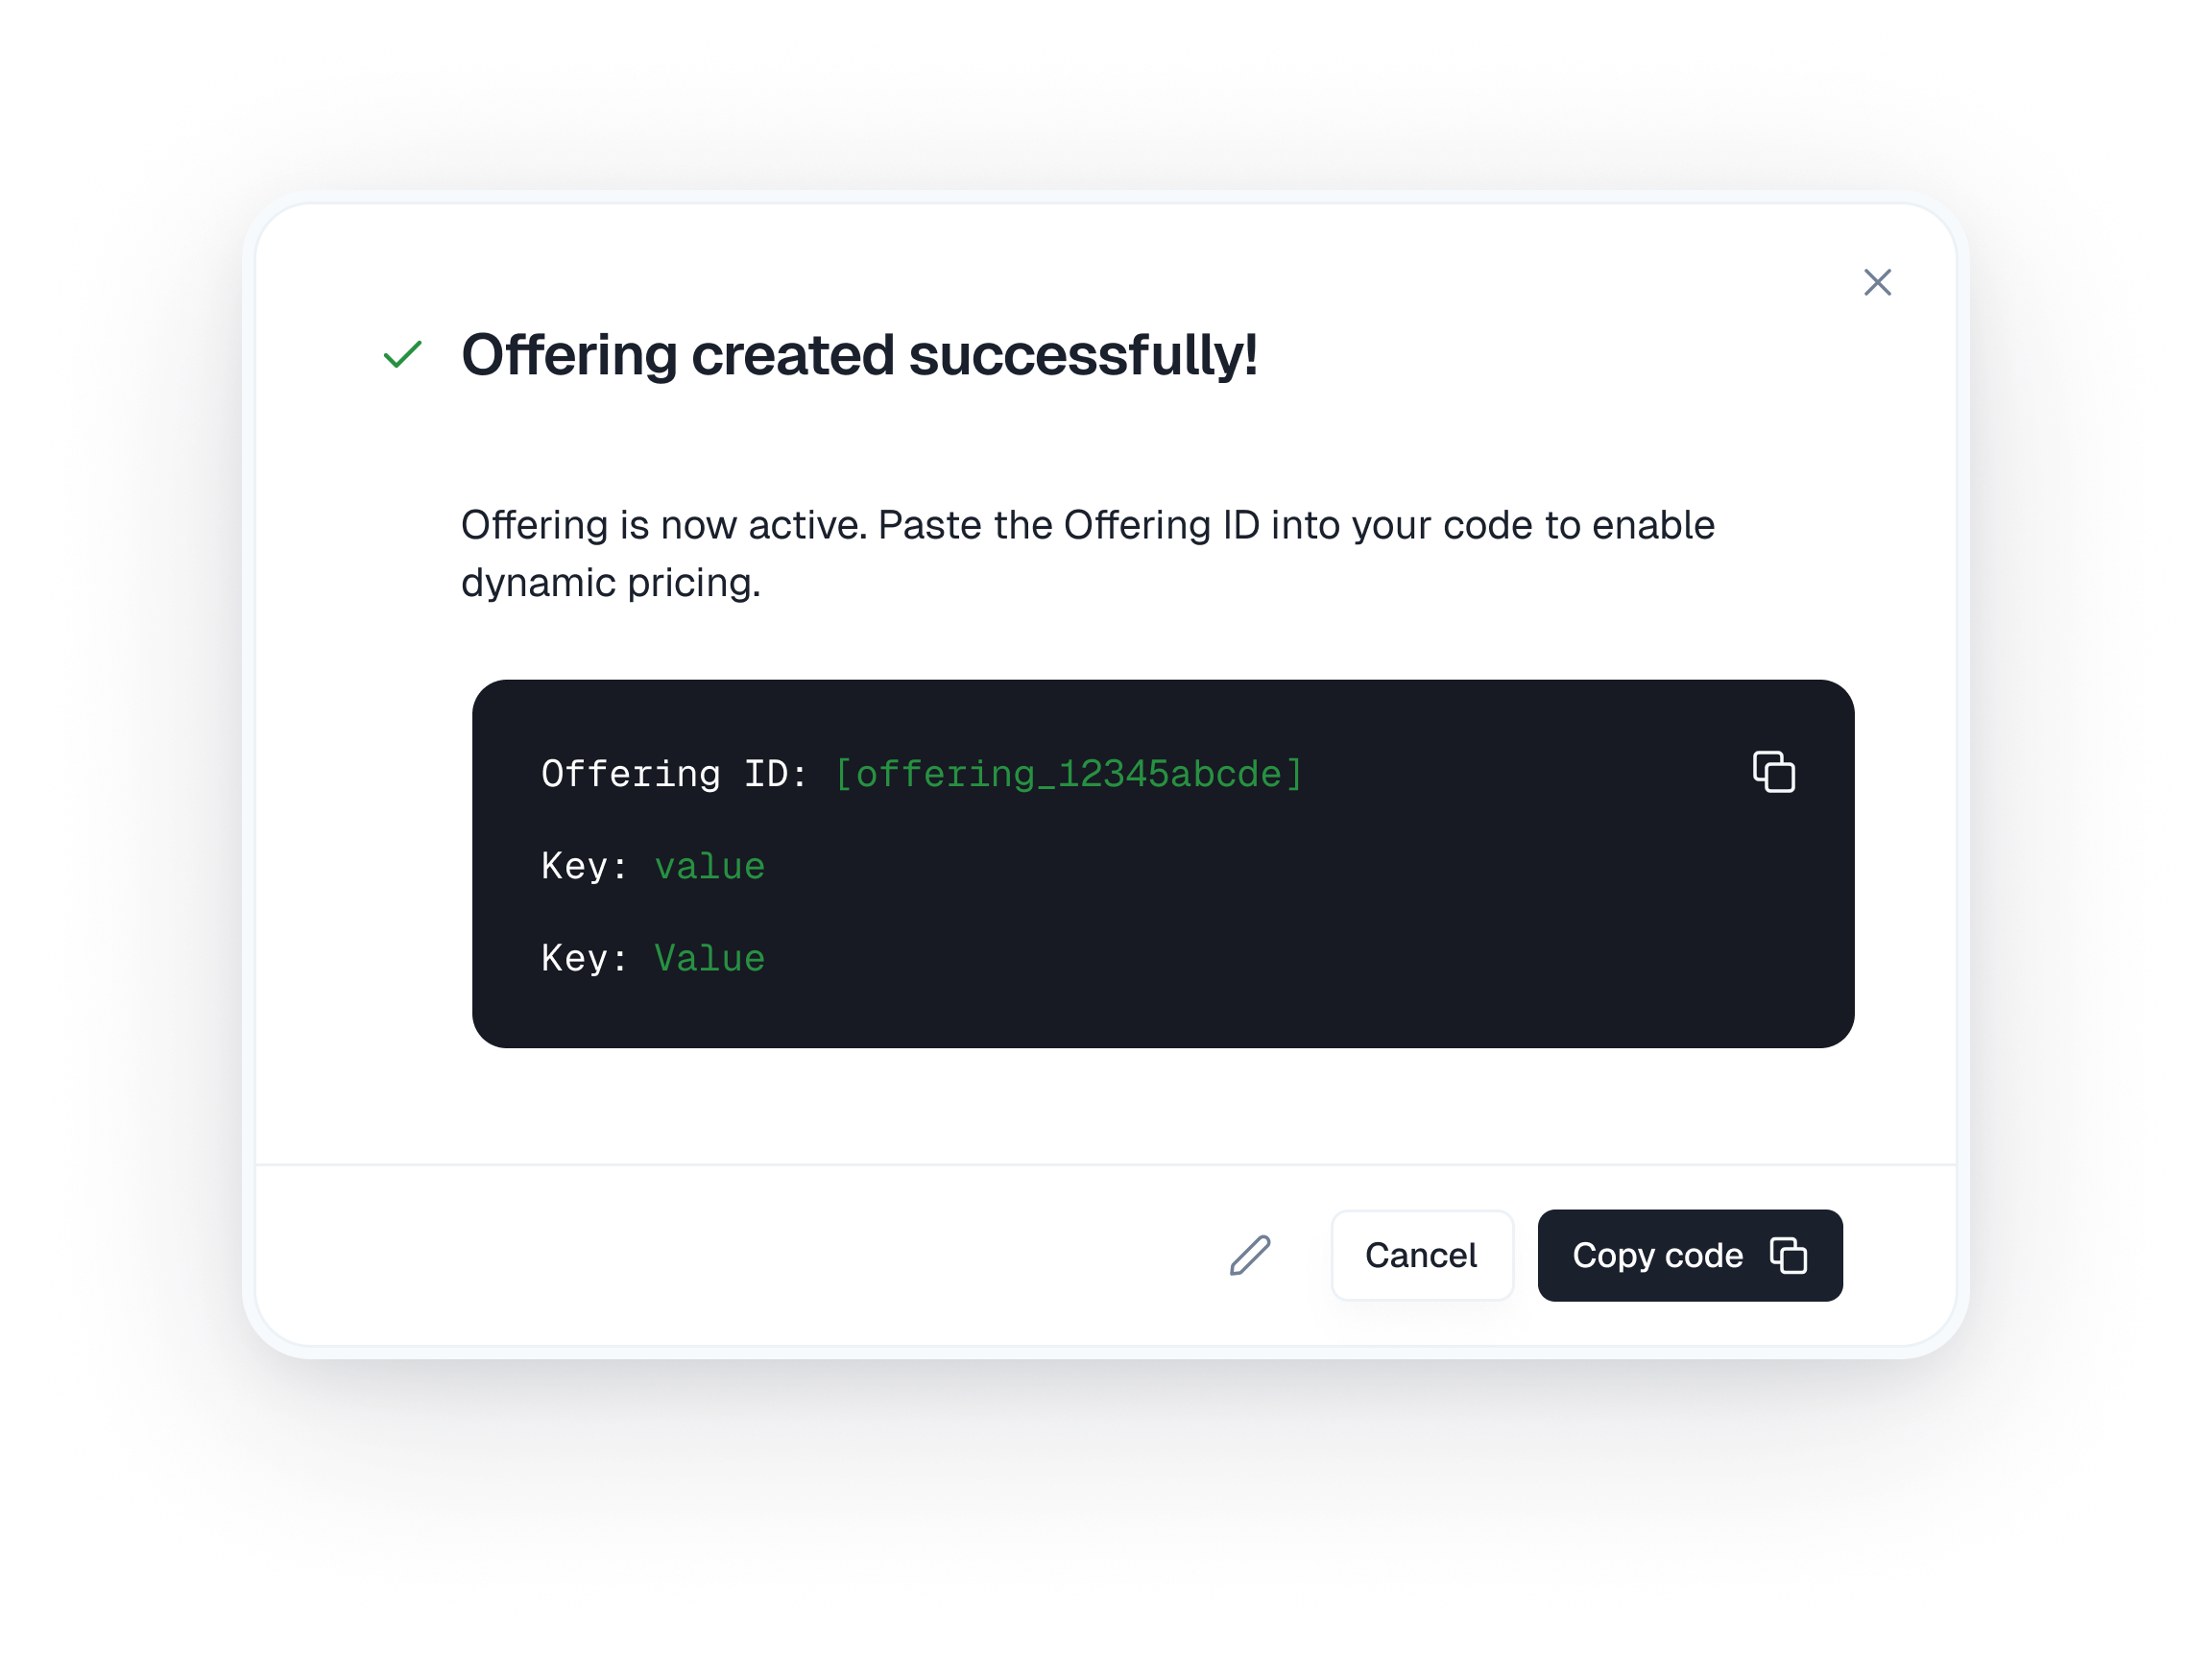
- This
Offering IDmust be pasted into your application’s code where you initialize the ParityDeals SDK or when you render the pricing table component. The ID tells your application which specific Offering (and therefore which pricing table configuration, plans, and pricing) to fetch and display to the end-user.