Are Promotions for you?
If you are a creator or company focused on running location-based pricing promotions (like Purchasing Power Parity discounts) without managing full subscription plans within ParityDeals, the Promotions are the direct tool for this purpose.For a full subscription business model with metered usage, feature entitlements, and advanced pricing models, use the tools within the Product Catalog and Monetization sections.
What are Promotions?
The ParityDeals Promotions enables you to implement purchasing power parity (PPP) pricing and other location-based discounts, allowing you to offer fair prices worldwide and increase your sales revenue growth. Location-based discounts are applied to groups of countries based on their economic factors. When a user visits your site from a targeted region, ParityDeals displays a promotional banner with the appropriate discount and coupon code based on their detected location.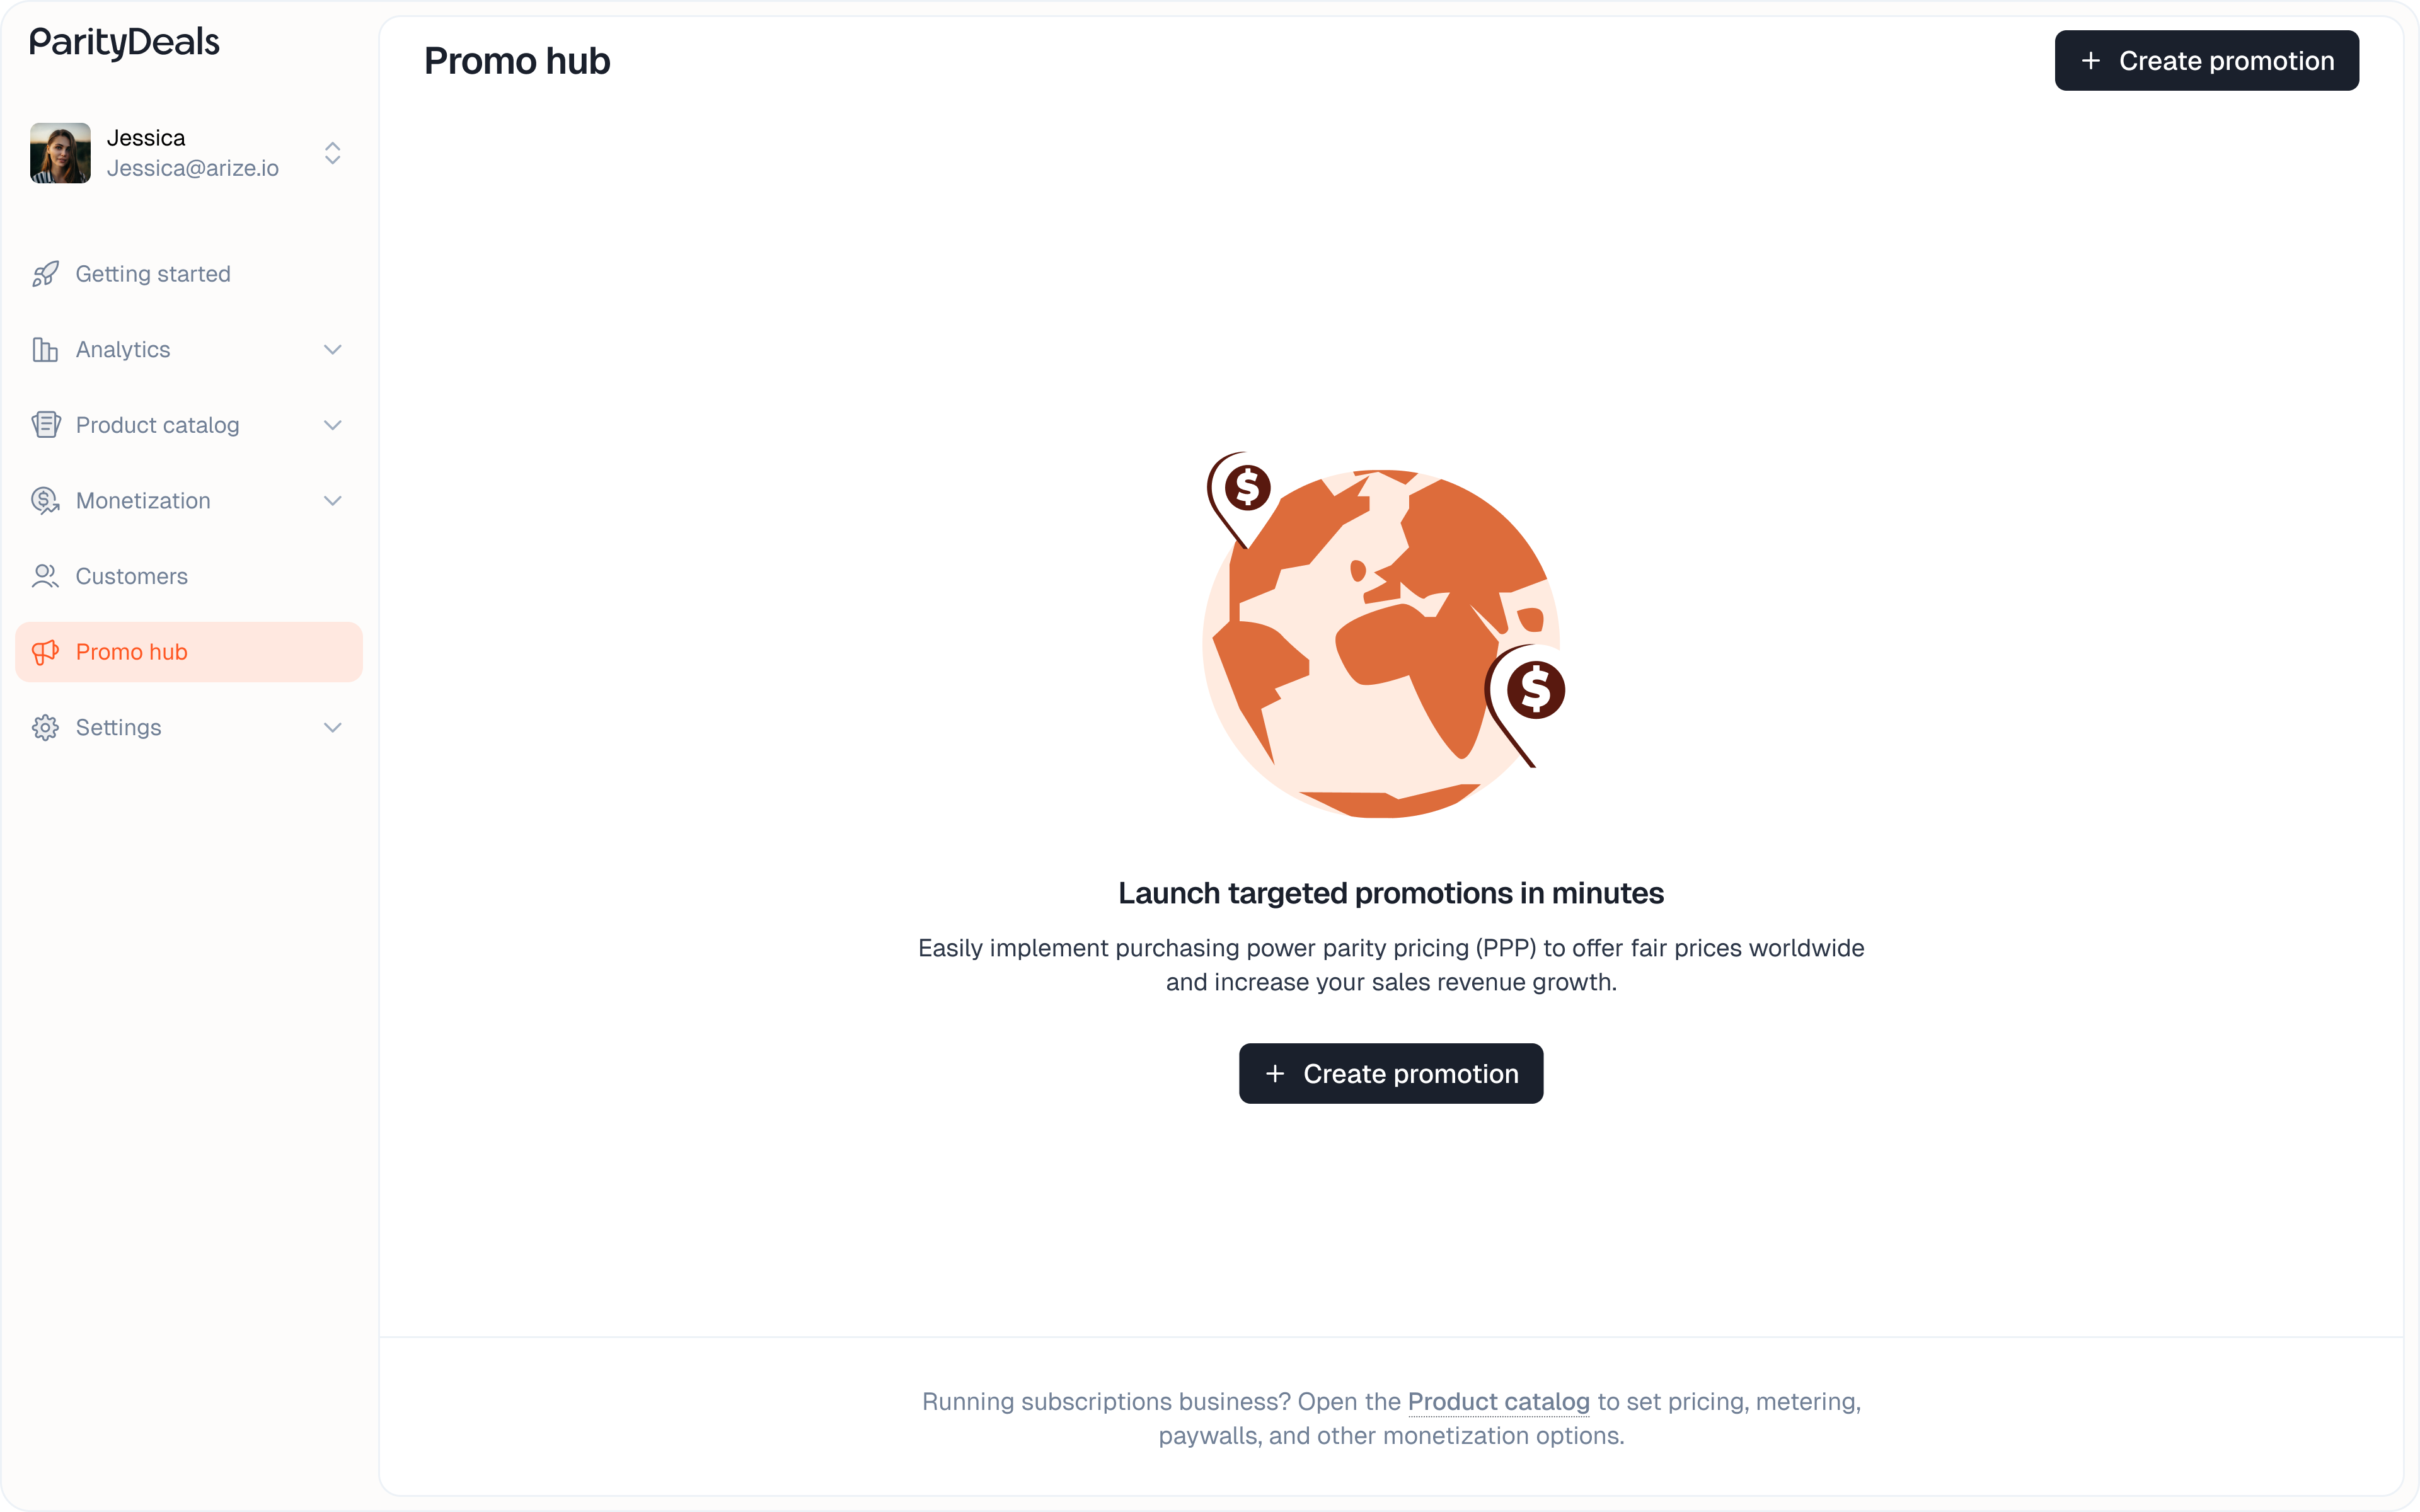
Getting Started: Two Paths for Promotion Setup
There are two primary workflows for setting up location-based discounts:Via Integrated Platforms (Recommended)
Connect to your existing payment platform (e.g., Stripe, Paddle). ParityDeals fetches your products and automatically creates the necessary discount coupons for you. This is the fastest and most streamlined method.
Custom Promotions Setup (Manual)
Use this method if you do not use one of our integrated platforms or if you need to manage coupon codes manually. You will define the discounts in ParityDeals, then create corresponding coupons in your payment provider and paste the codes back into ParityDeals.
Setting Up Promotions via Integrated Platforms
This is the recommended workflow if you sell your product via a supported payment platform.Step 1: Connect to Your Payment Platform
- From the main sidebar, navigate to Promotions.
- Click the ”+ Create promotion” button.
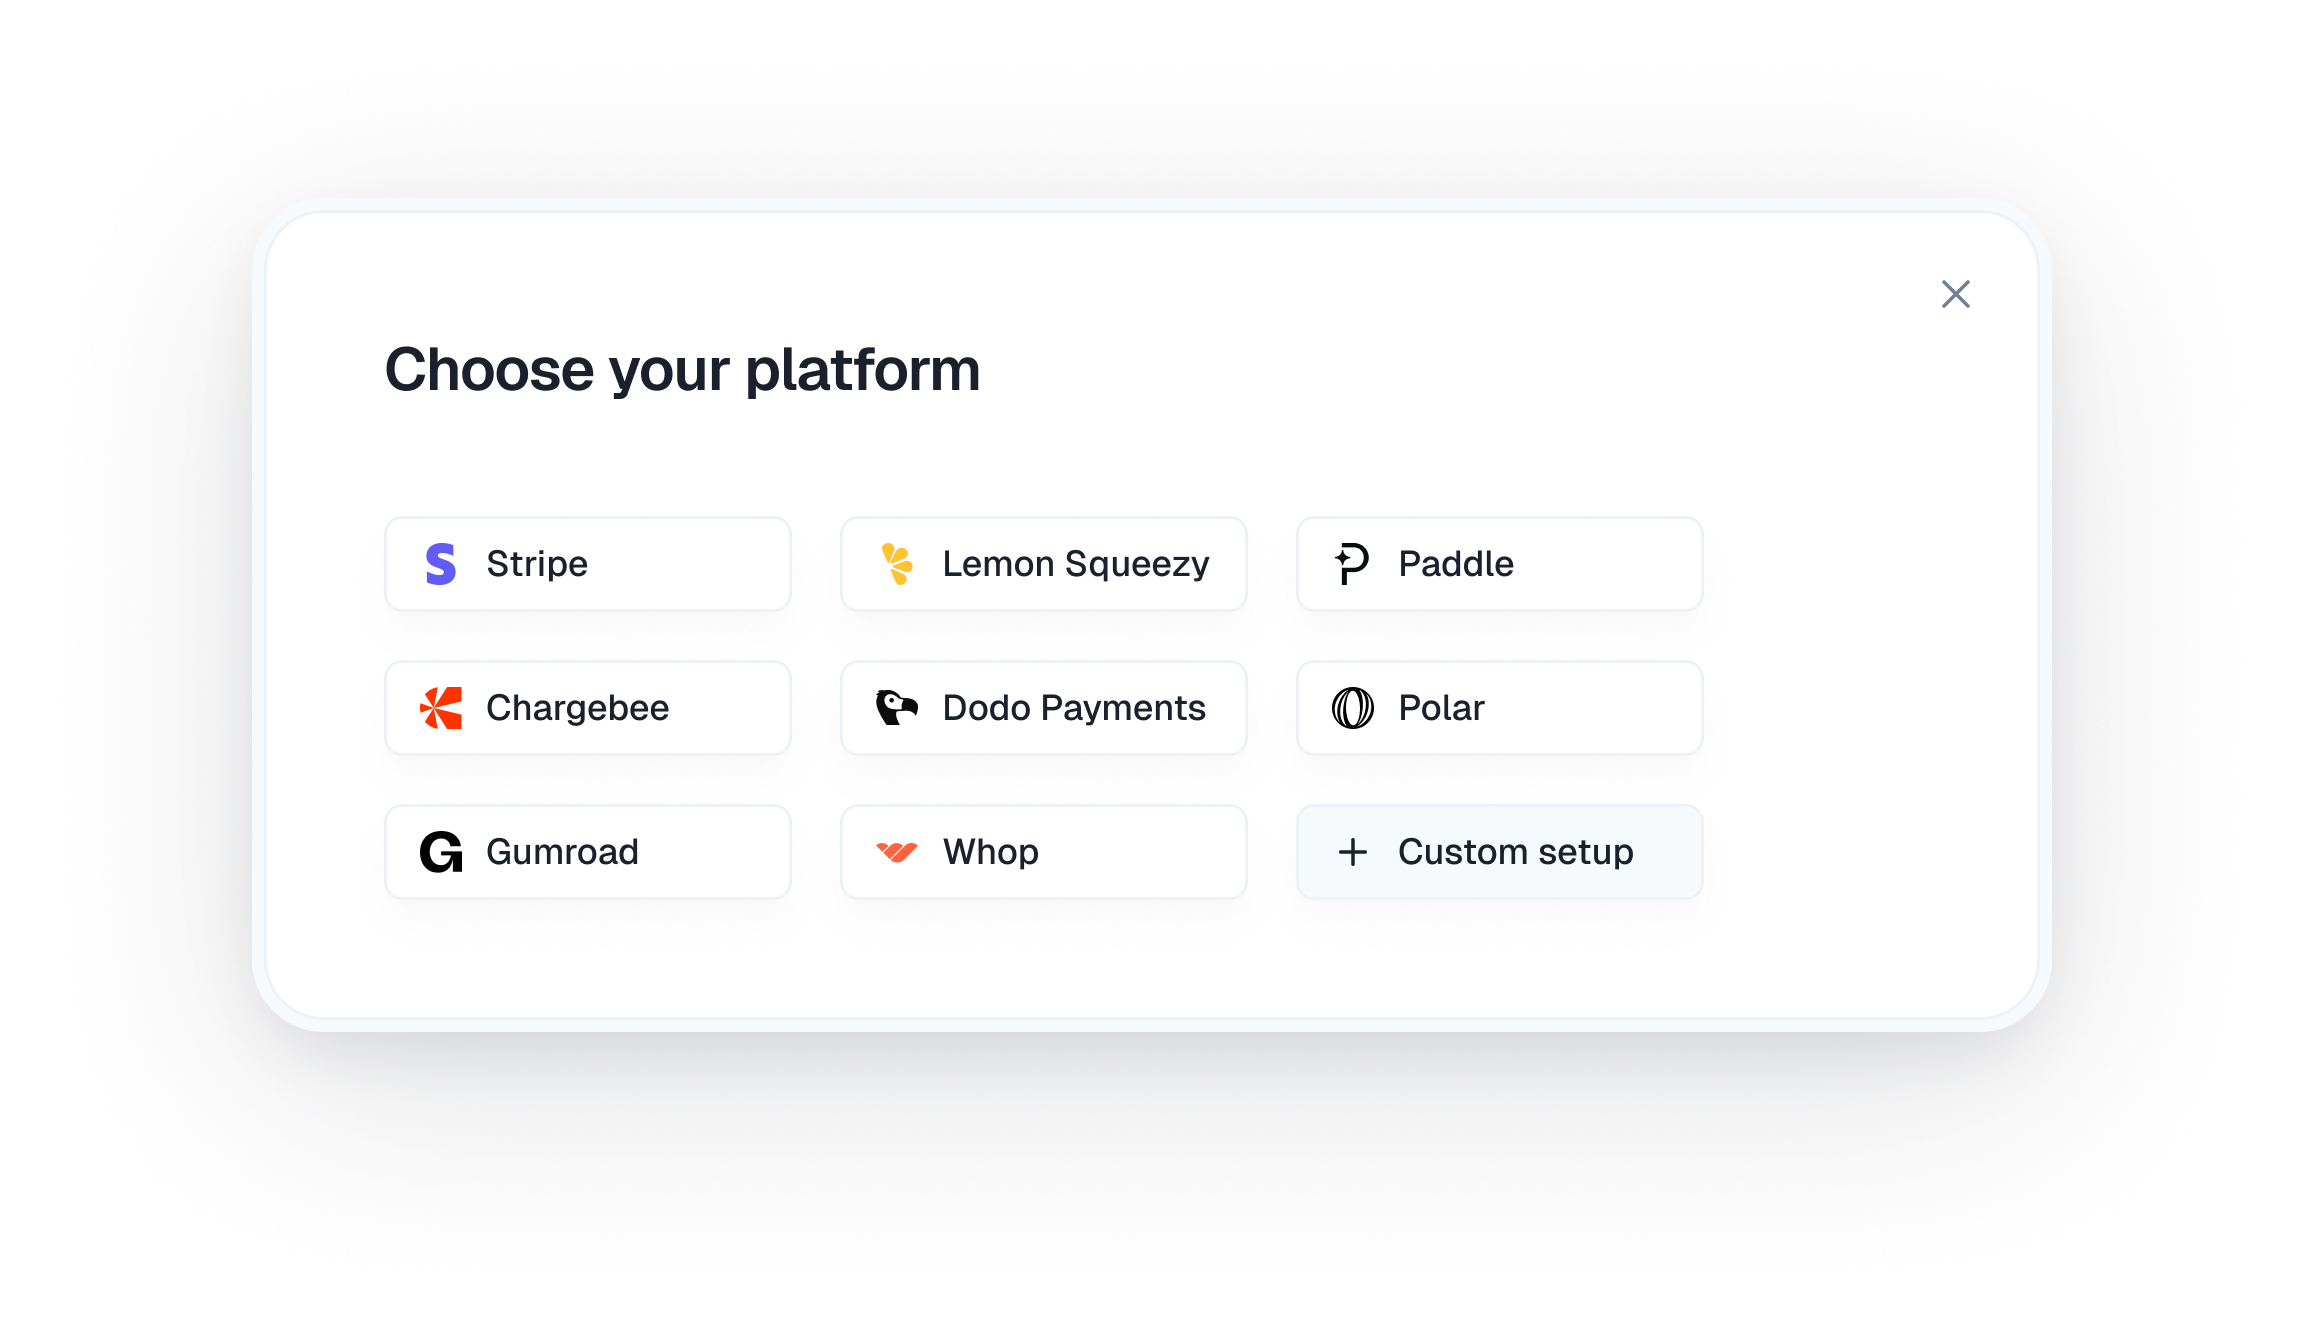
- In the “Choose your platform” modal, select the platform you use.
- Supported integrations include Stripe, Lemon Squeezy, Paddle, Chargebee, Dodo Payments, Polar, Gumroad, and Whop.

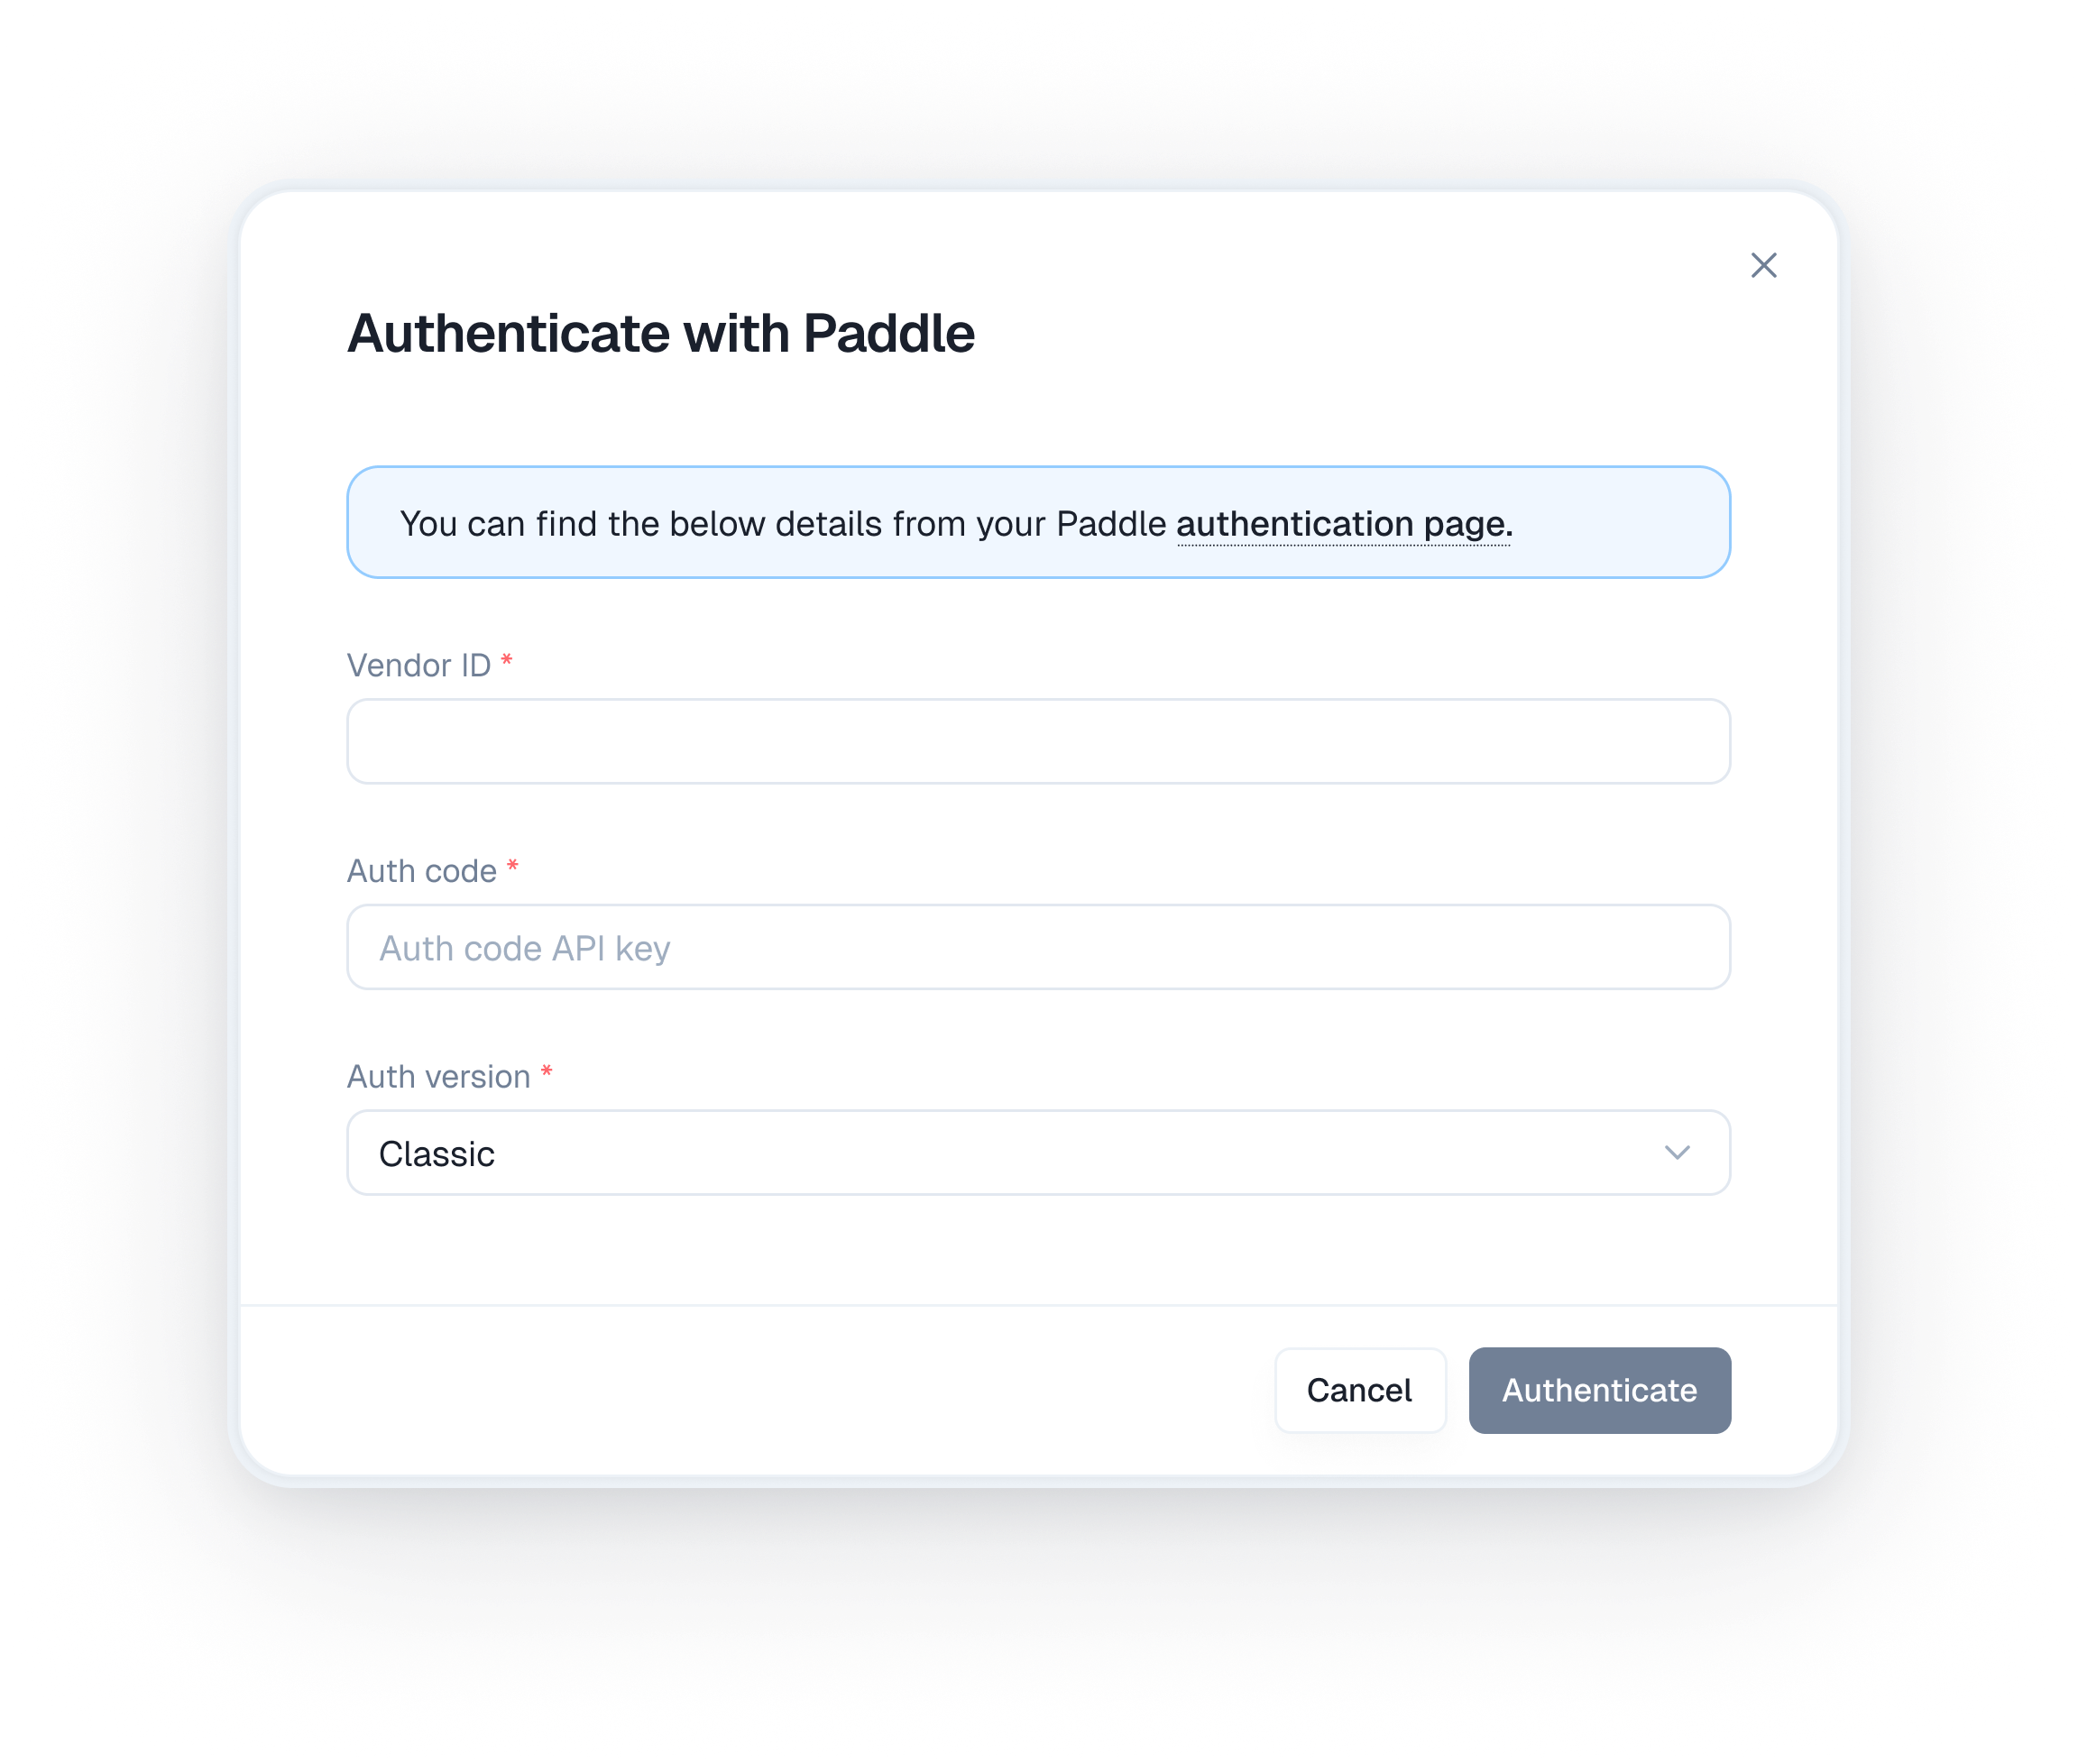
- If connecting for the first time, an authentication modal will appear. Enter the required credentials (e.g., Vendor ID, Auth code/API key) to connect your account.
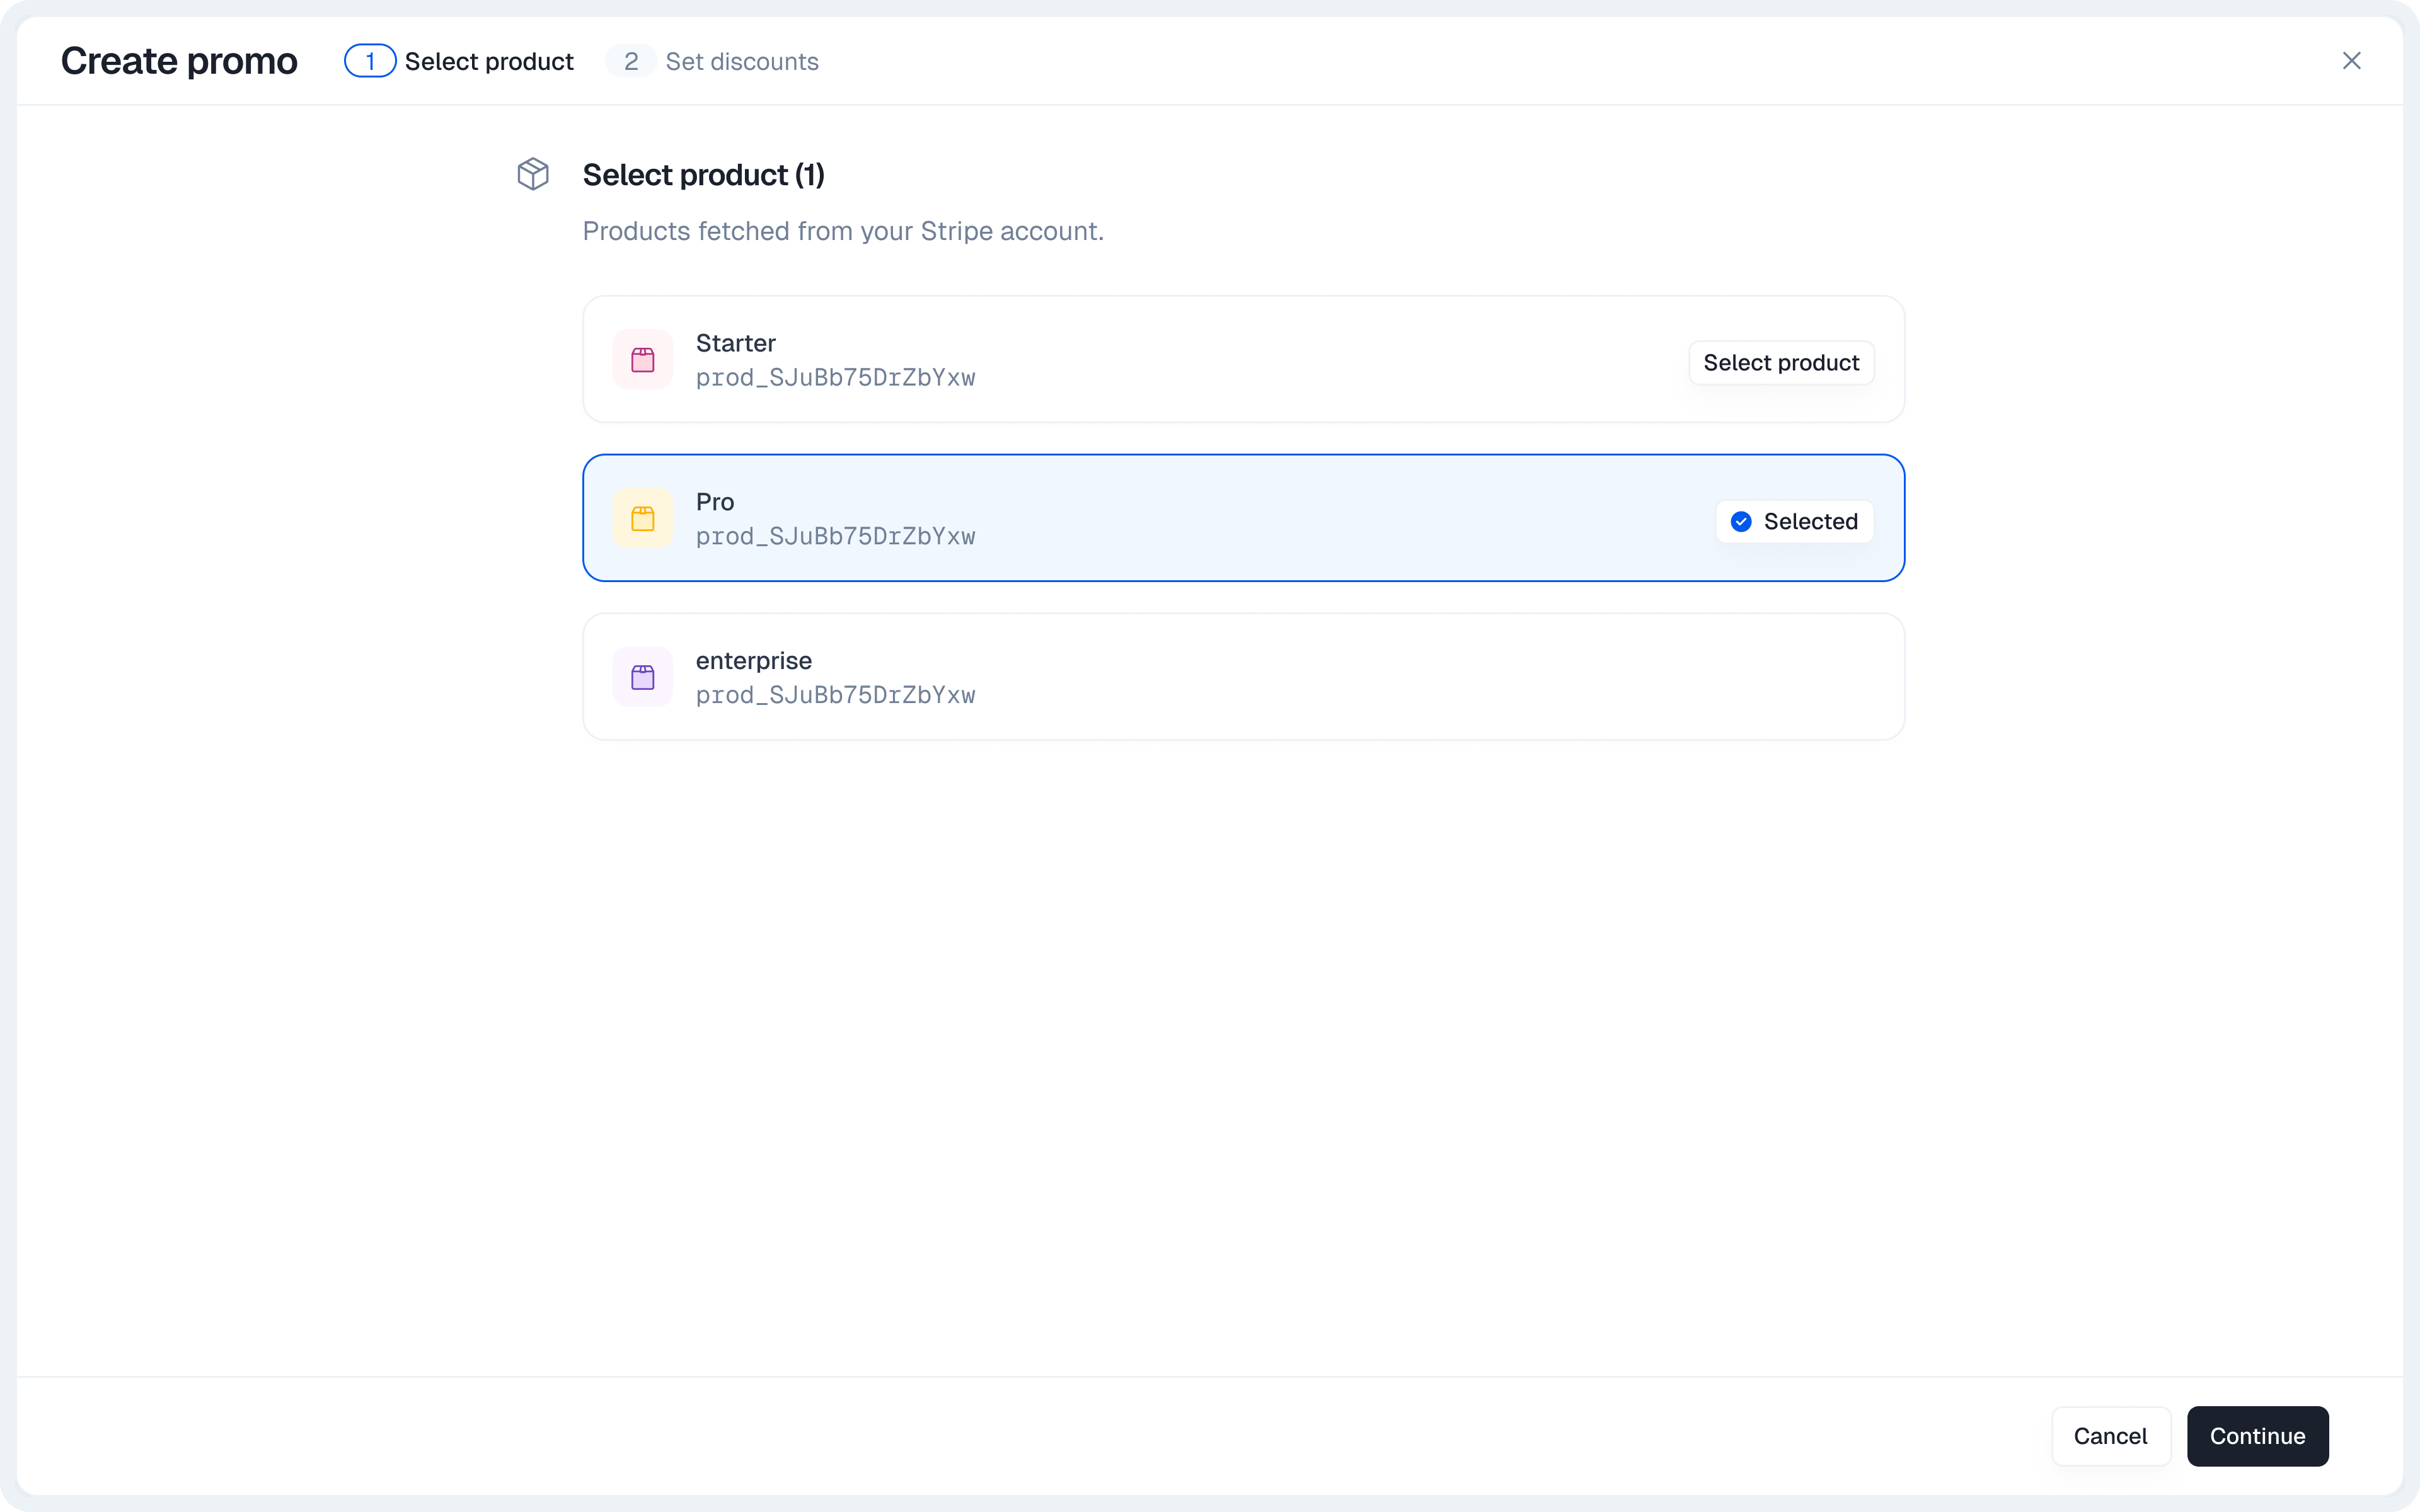
Step 2: Select Your Product
After authenticating, the two-step promotion creation flow begins.- Select Product: A list of products fetched from your connected platform account (e.g., Stripe) is displayed.
- Choose the product for which you want to set up discounts and click “Continue”.
Step 3: Set Discounts
You will now see the “Set up discounts” screen, which displays countries grouped by their purchasing power parity factor.-
Review Discounts: Review the predefined discount percentages for each PPP group and update them as needed. If you do not want to offer a deal for a specific group, leave the discount box empty.
ParityDeals will automatically create the necessary discount coupons on your integrated platform based on the percentage values you set here.
-
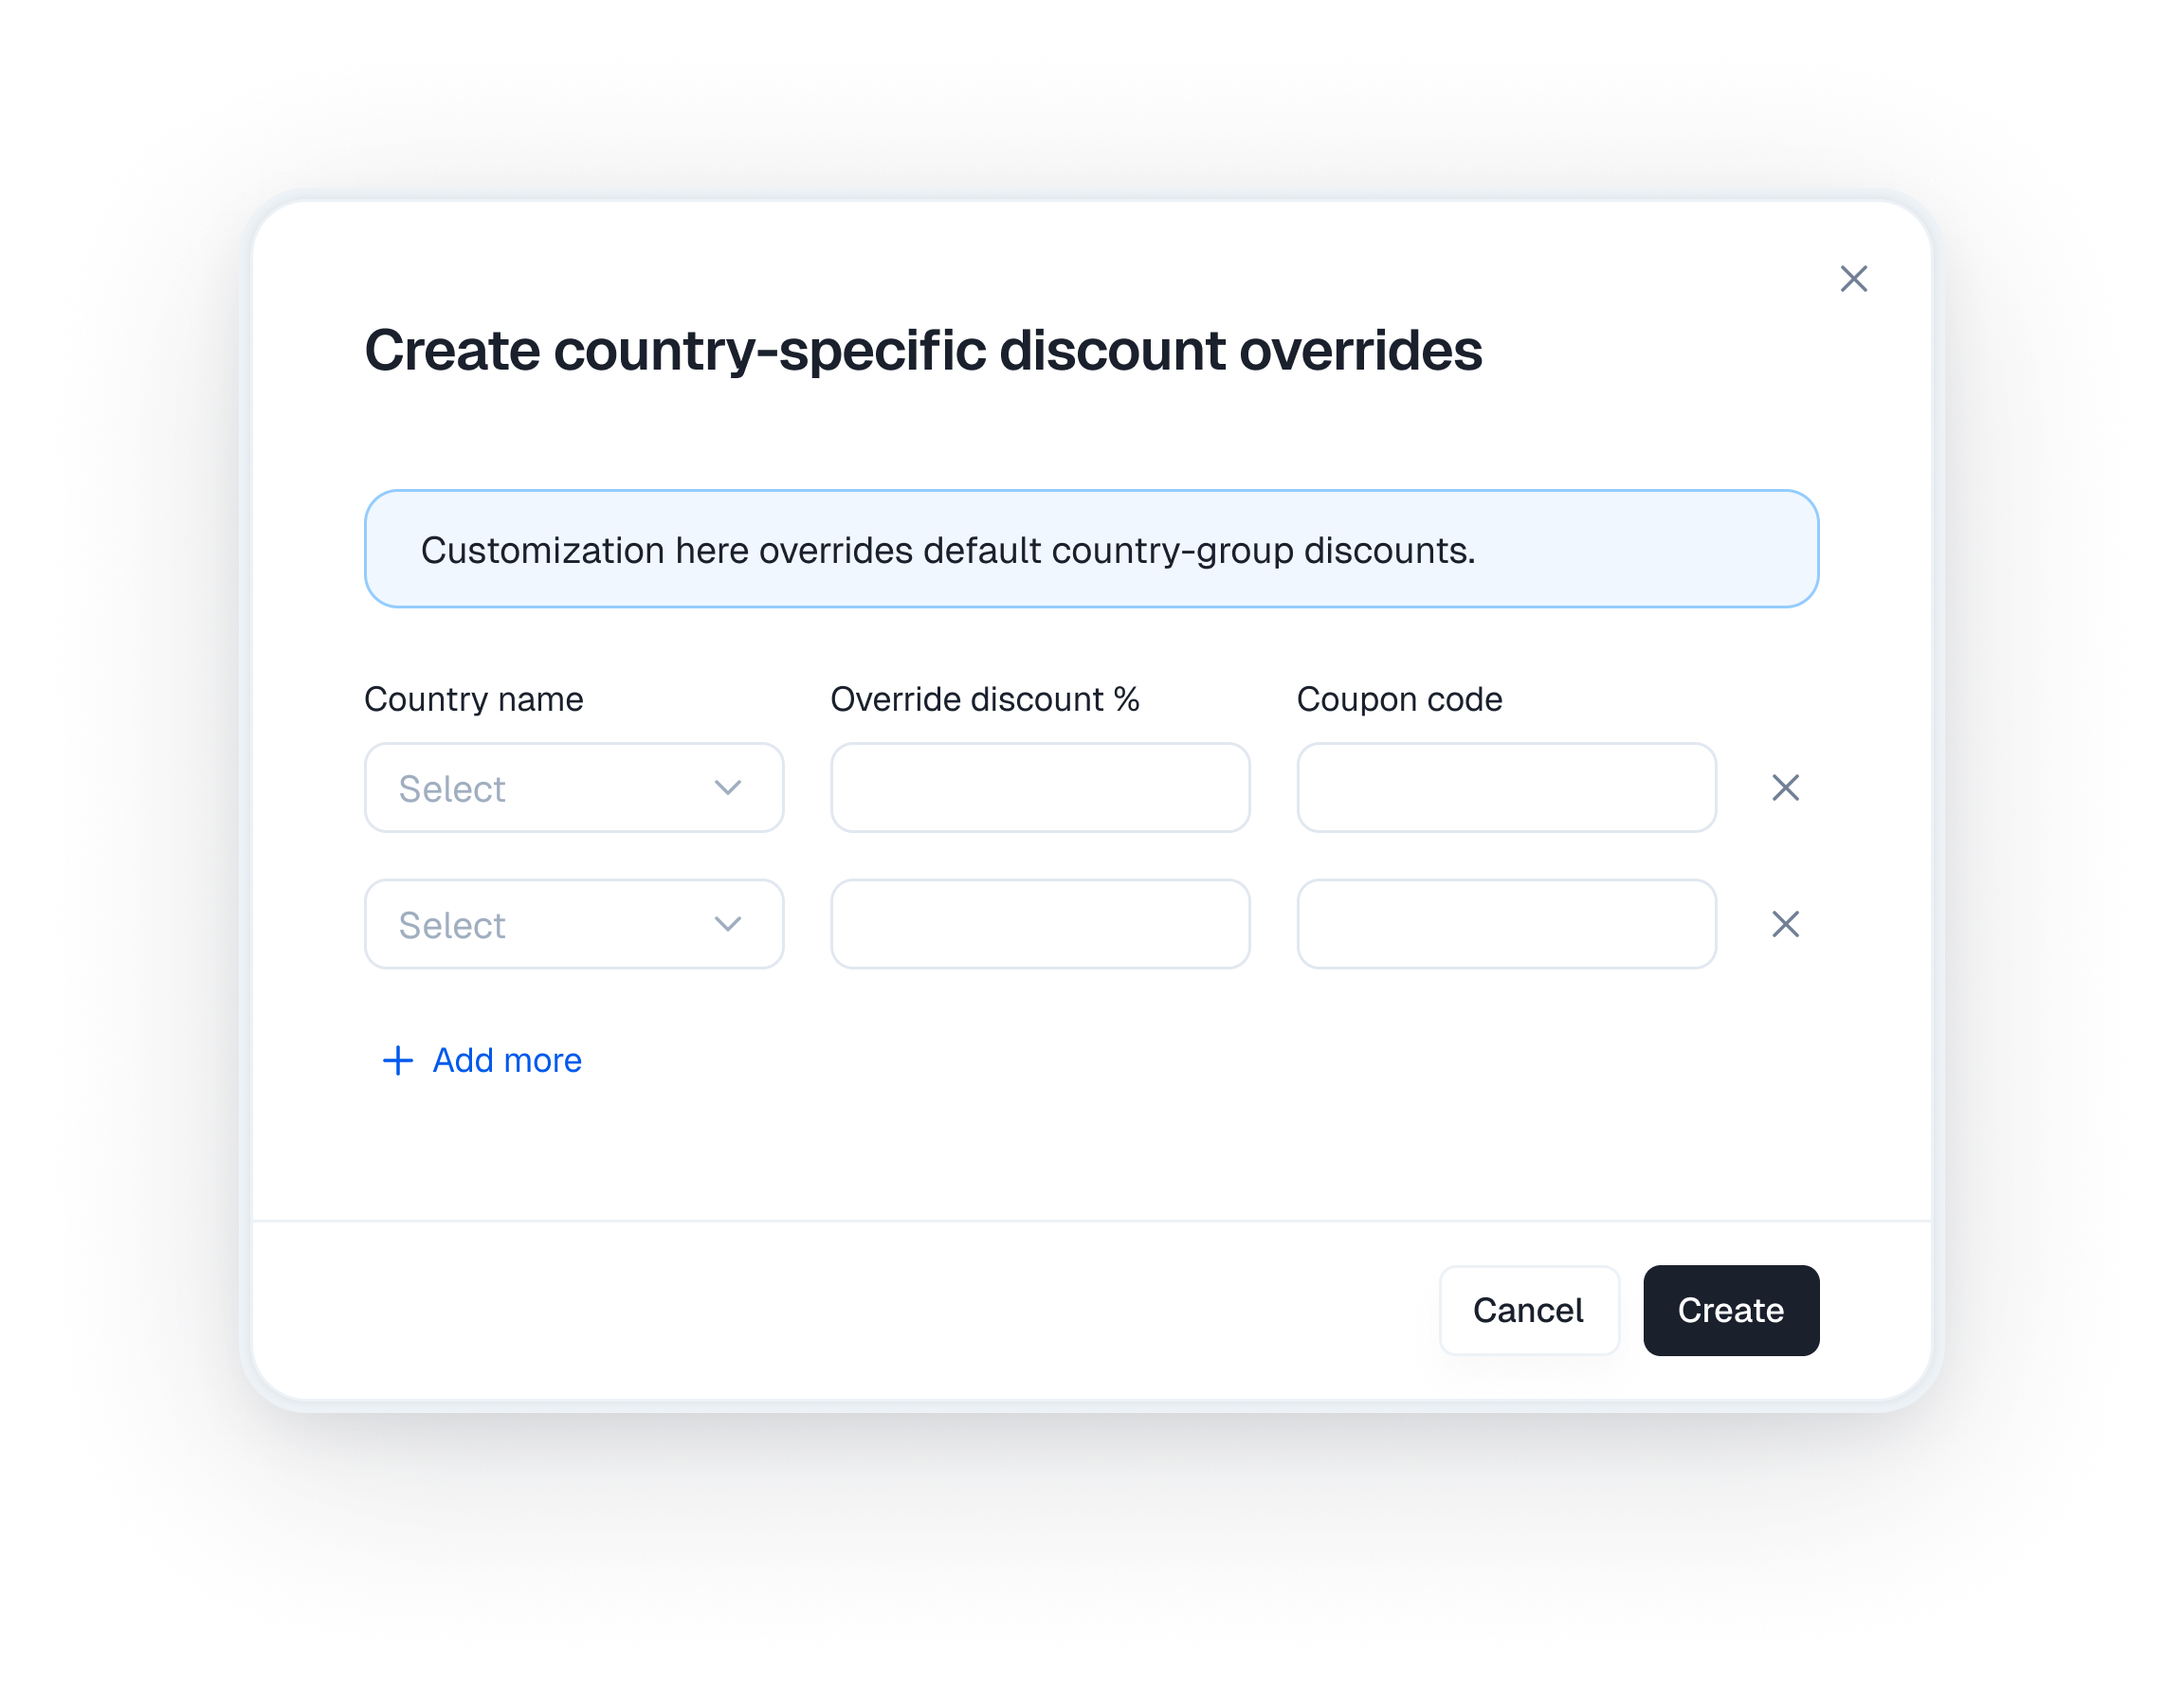
(Optional) Override Group Discounts: To set a different discount for a specific country that overrides its group’s default discount, click the ”+ Create country-specific discount” button.
- In the modal that appears, select a country from the dropdown, enter the
Override discount %, and optionally a specificCoupon codeif you want to use a pre-existing one. - Click ”+ Add more” to specify overrides for multiple countries.
- Click “Create” to save your overrides.
- In the modal that appears, select a country from the dropdown, enter the
Step 4: Create the Promotion
- Once you are satisfied with your discount settings, click the “Create promo” button at the bottom-right of the page.
Setting Up Custom Promotions (Manual)
Use this method if you do not use one of our integrated platforms or prefer to manage coupon codes manually.Step 1: Initiate Custom Setup
- Navigate to Promotions from the sidebar and click ”+ Create promotion”.
- Select “Custom setup” from the platform choice modal.
Step 2: Define Product and Set Discounts
This action takes you to the “Create Promotion” page.- Product Setup: In the “Product setup” section, enter your Product name manually.

- Set Up Coupons: This section displays countries grouped by purchasing power parity.
- Review Discounts: Review the predefined discount percentages for each group and update them as needed.
- Enter Coupon Codes: You must first manually create the corresponding discount coupons in your payment provider’s platform. Then, paste each coupon code into the respective “Coupon code” field in ParityDeals.
- (Optional) Override Group Discounts:
- Click the ”+ Create country-specific discount” button.
- In the modal, select a country, set the
Override discount %, and paste the specificCoupon codeyou created for it. - Click ”+ Add more” for additional country-specific overrides.
- Click “Create” to save your overrides.
Step 3: Create the Promotion
- Once all discounts and coupon codes are set, click the “Create promo” button at the bottom-right corner.
After Creation: Configuring Your Promotion
After creating a promotion using either method, you will land on its detail page and see a success message. This page contains multiple tabs for powerful post-creation configurations.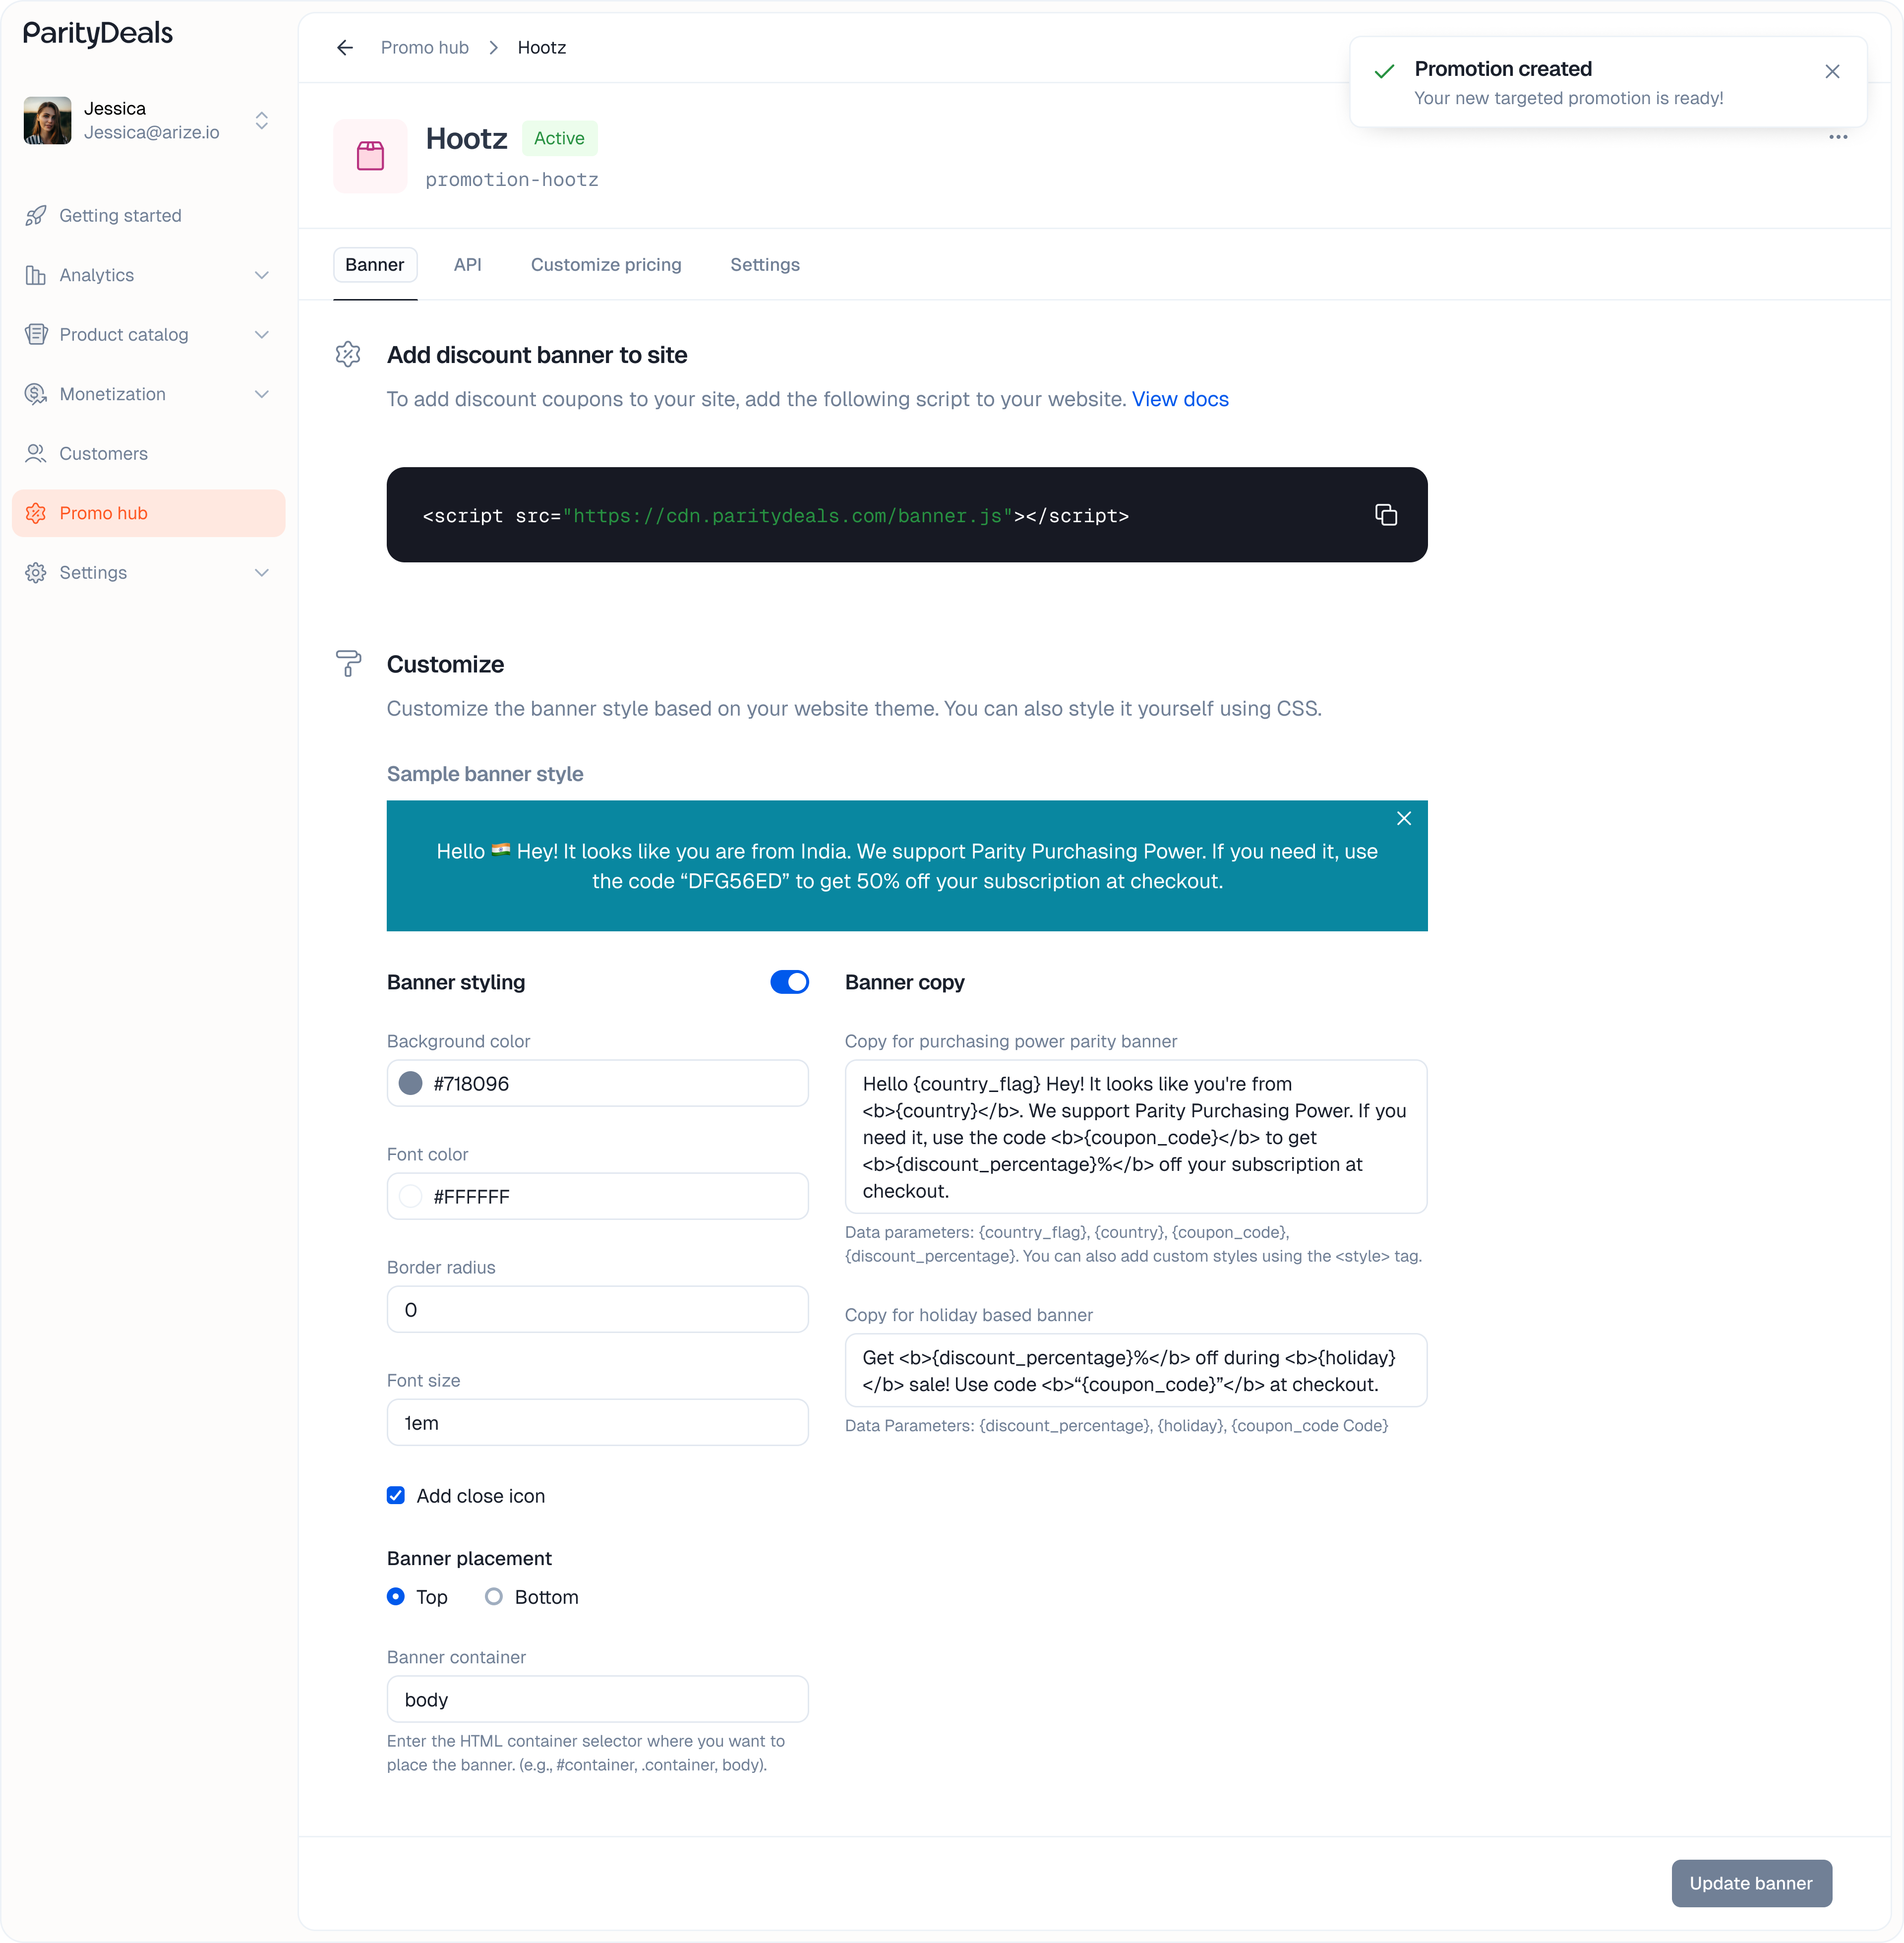
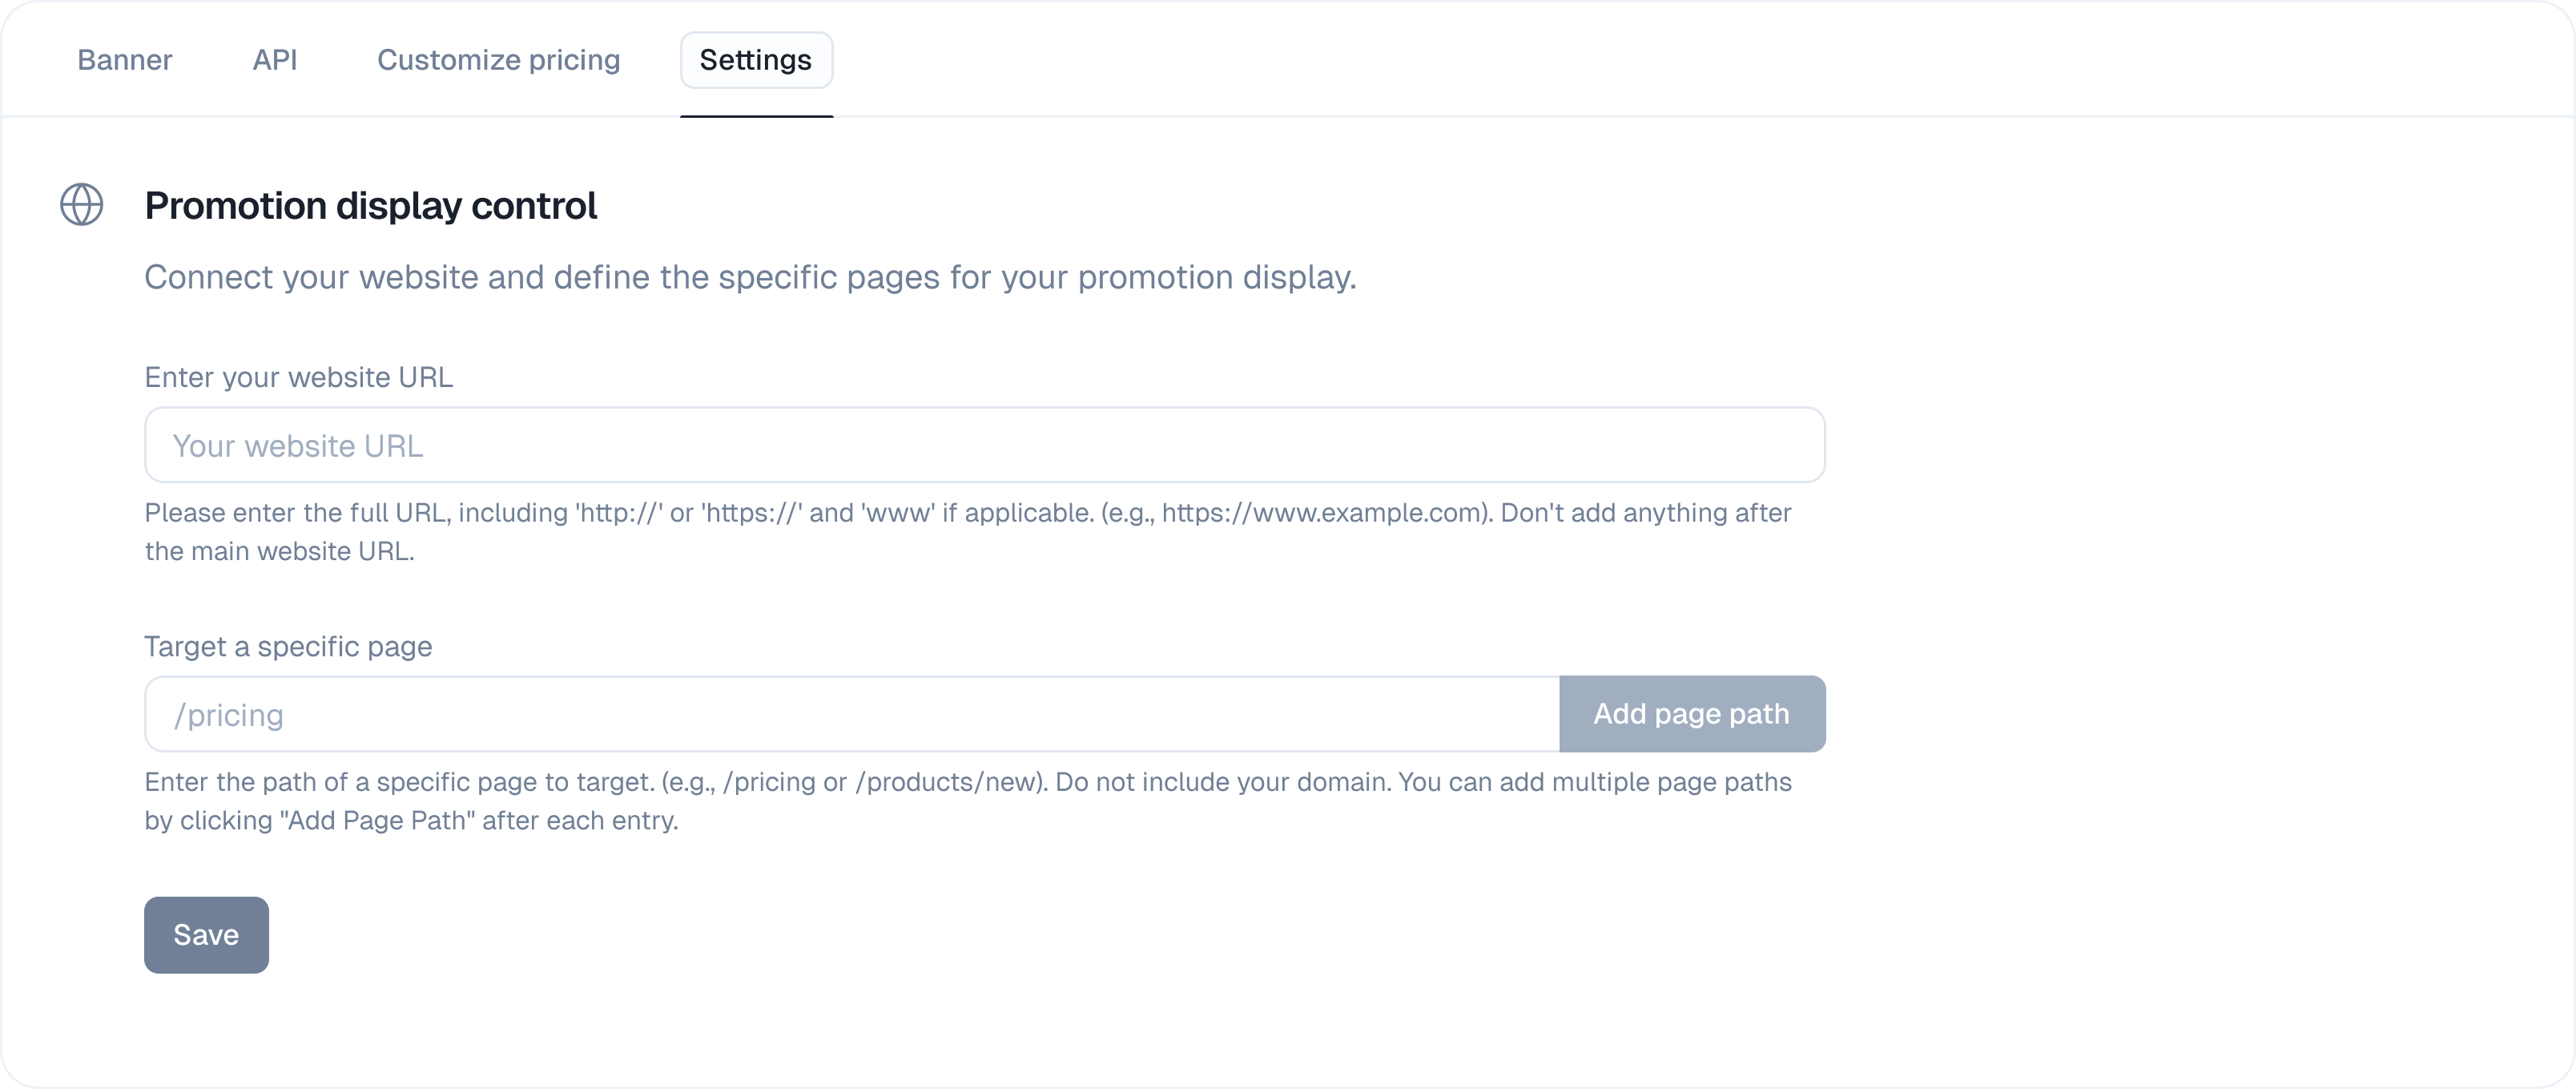
- Settings
This tab allows you to customize the promotional banner that will be displayed on your site and provides the code to make it live.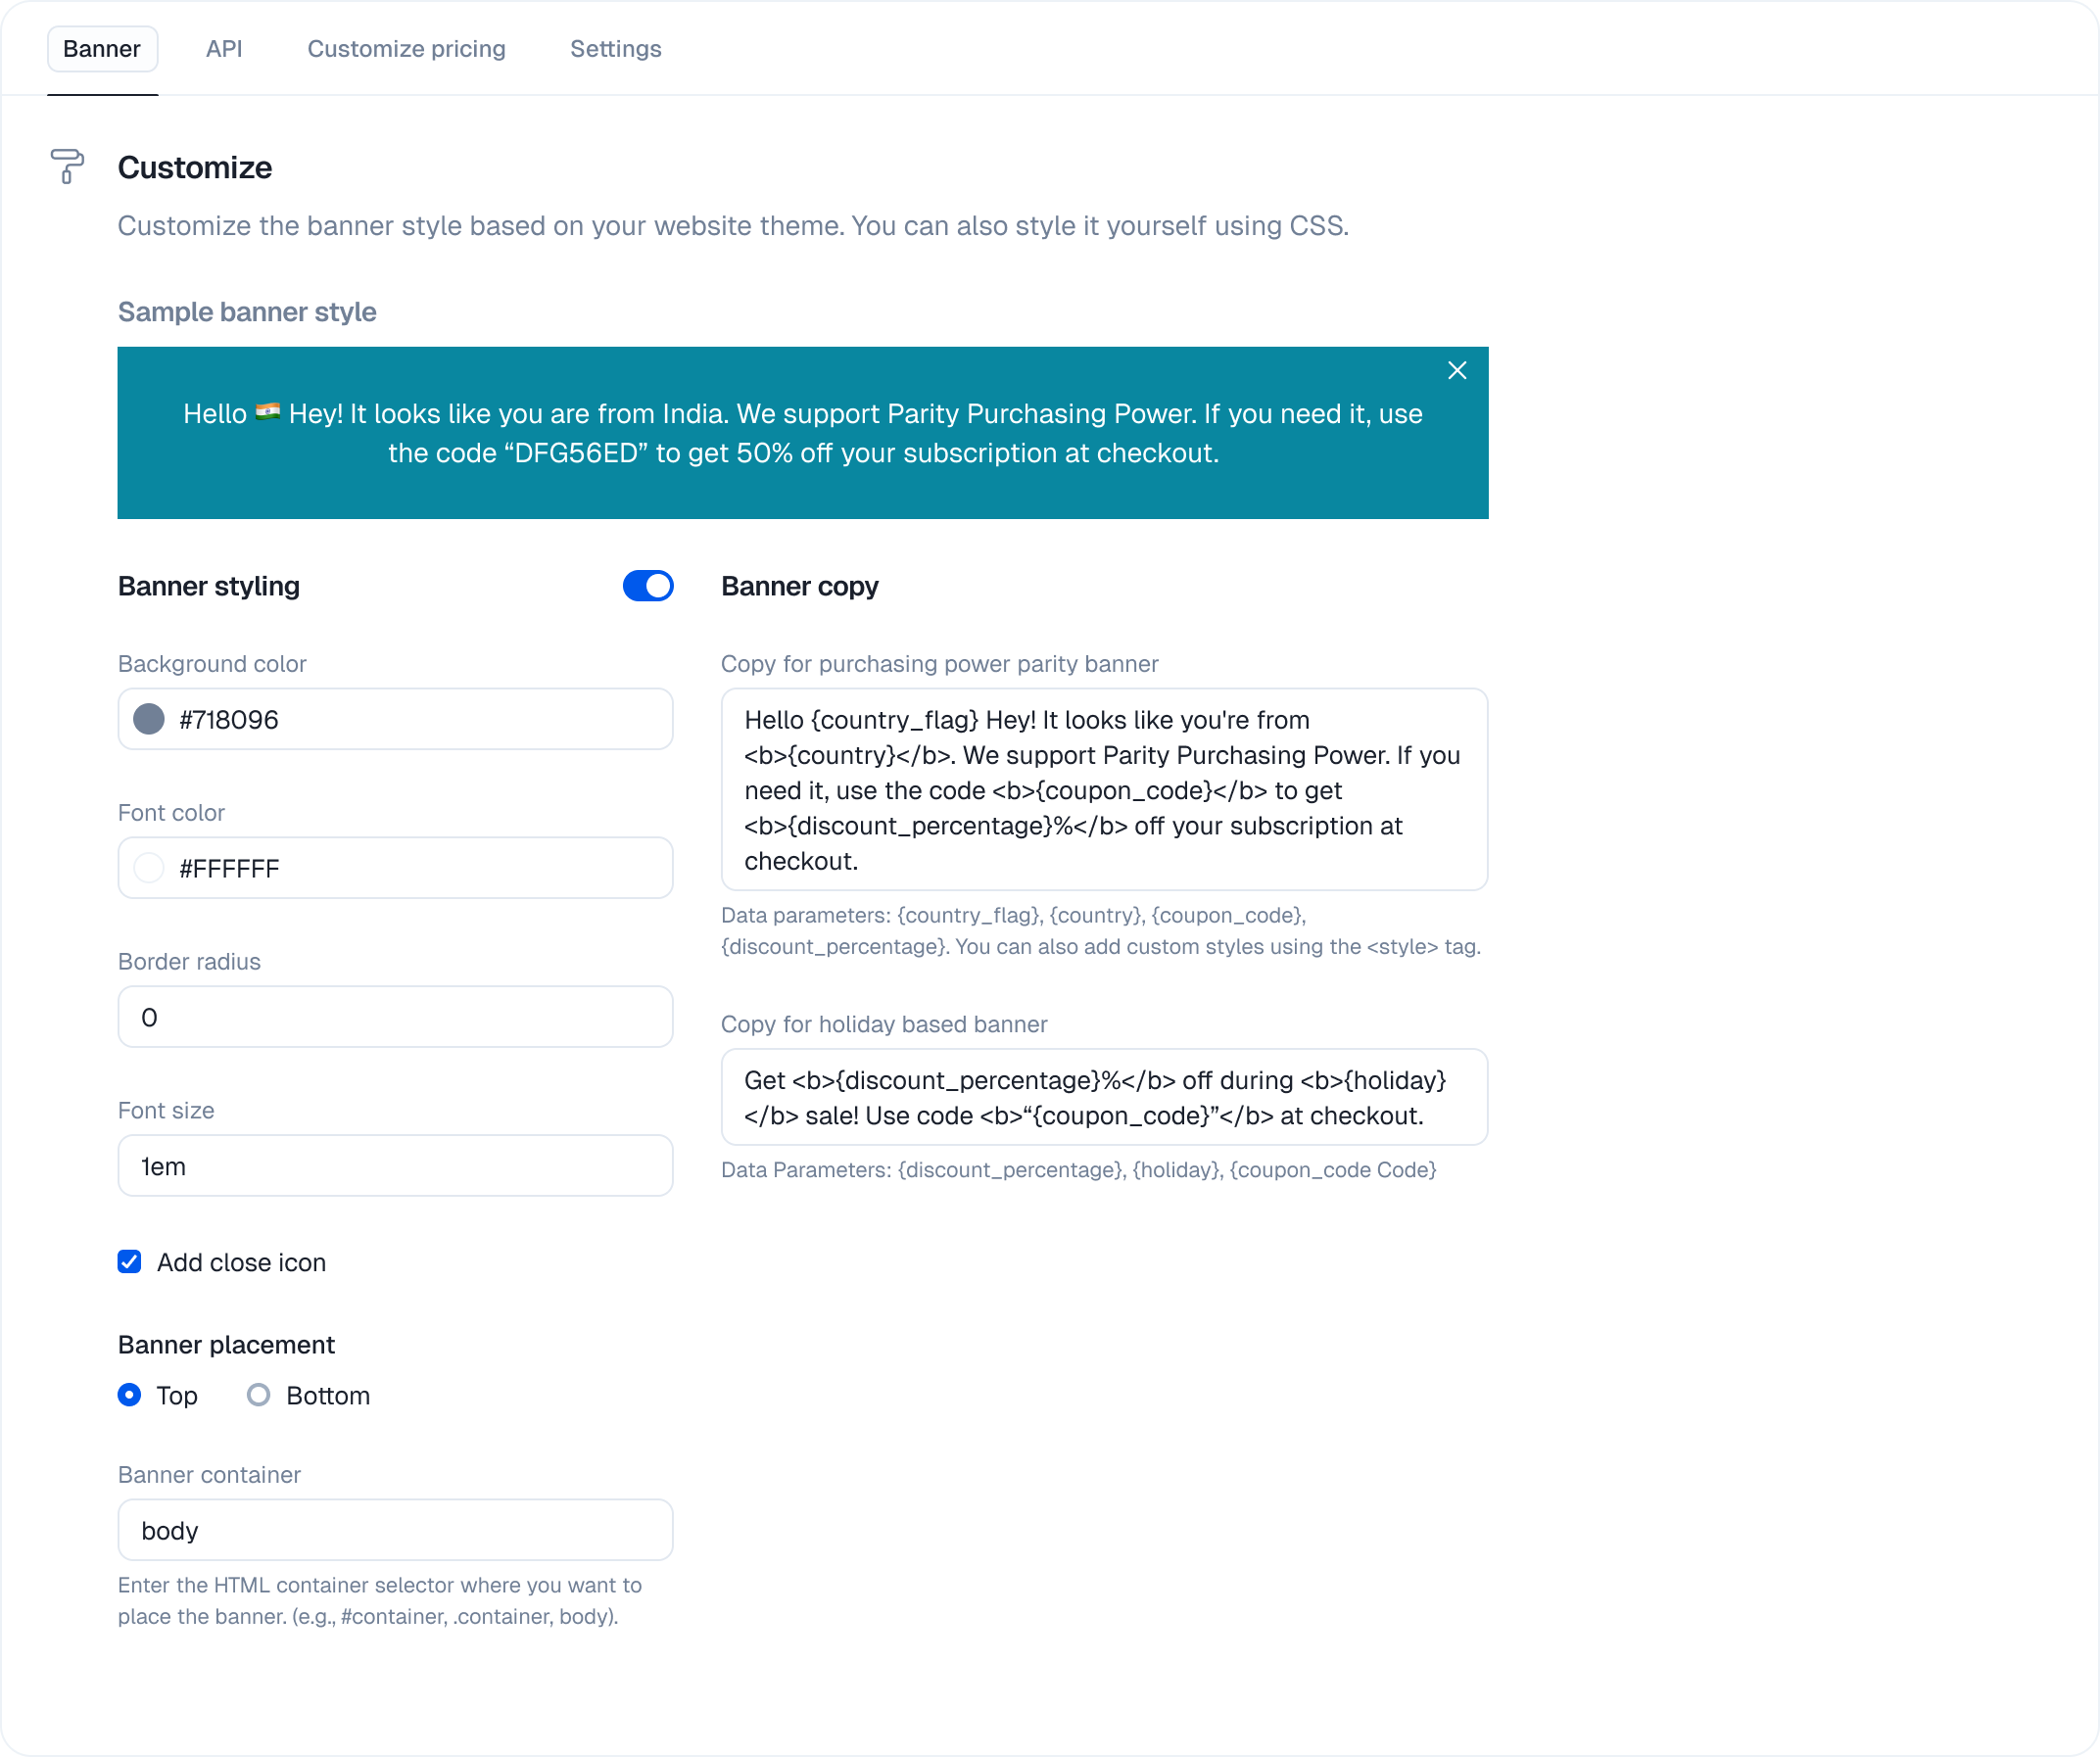
Banner Styling
Customize the banner’s appearance to match your website’s theme using the no-code style editor:- Background color, Font color, Border radius, Font size
Banner Copy
Toggle on “Banner copy” to customize the text displayed. You can use dynamic variables to make the banner more personalized:{country_flag}- The visitor’s country flag emoji.{country}- The visitor’s country name.{coupon_code}- The specific coupon code for the visitor’s region.{discount_percentage}- The discount percentage.- Example Copy:
Hello {country_flag}! It looks like you're from {country}. We support Parity Purchasing Power. Use the code <b>{coupon_code}</b> to get <b>{discount_percentage}%</b> off your subscription at checkout.
Banner Placement
- Position: Choose to display the banner at the Top or Bottom of the viewport.
- Banner Container: Enter the HTML container selector where you want the banner to be placed (e.g.,
#container,.main-content,body).
Integrate into your app
Adding ParityDeals to your app is simple. You can:- Show a banner based on the user’s location
- Directly update the price
Managing Promotions
You can edit a promotion at any time after it has been created.- Navigate to the Promotions list page.
- Click the three-dot menu on the promotion you wish to edit and select the “Edit” option from the dropdown. (Alternatively, you can navigate to the promotion’s detail page and find an “Edit” option there).

- This action takes you back into the promotion editing flow where you update the details.
- Click “Update promo” (or a similar button) to save your changes. Your updates will be reflected live for your users.
Best Practices
- Always test your promotion setup on a staging environment before going live.
- Use clear, descriptive names for each promotion and discount rule.
- Regularly review and update your discount percentages to match market conditions.
- Use country overrides sparingly and only when necessary.
- Never expose secret identifiers in public code.
Troubleshooting
Discount not applied?- Check your product selection and country rules.
- Ensure the user is eligible for a discount based on your rules.
- For integrated platforms, verify your payment provider connection is active.
- Ensure your domain is whitelisted in the promotion settings.
- Make sure your API integration uses the correct identifier and parameters.